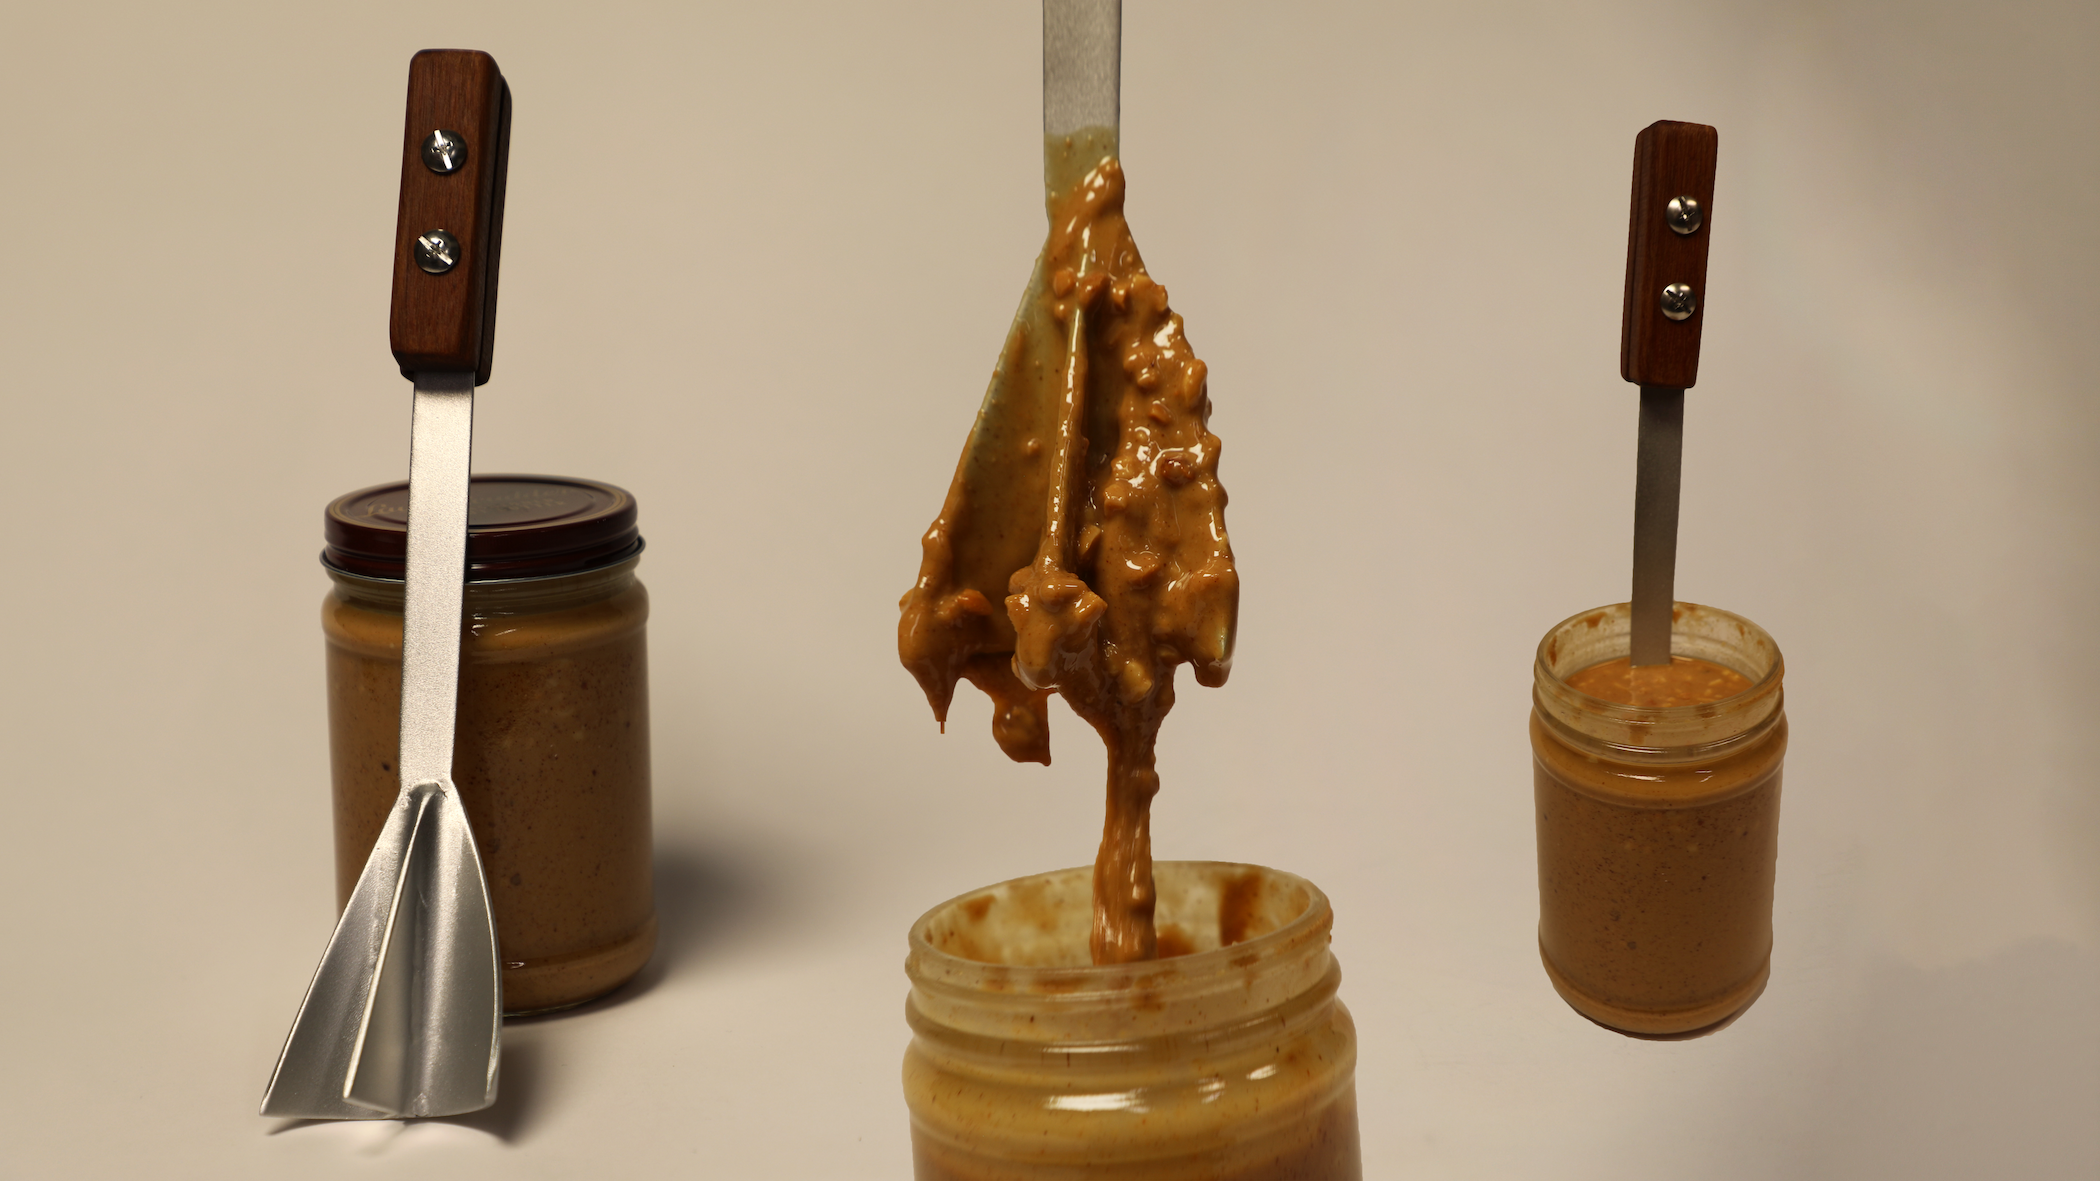
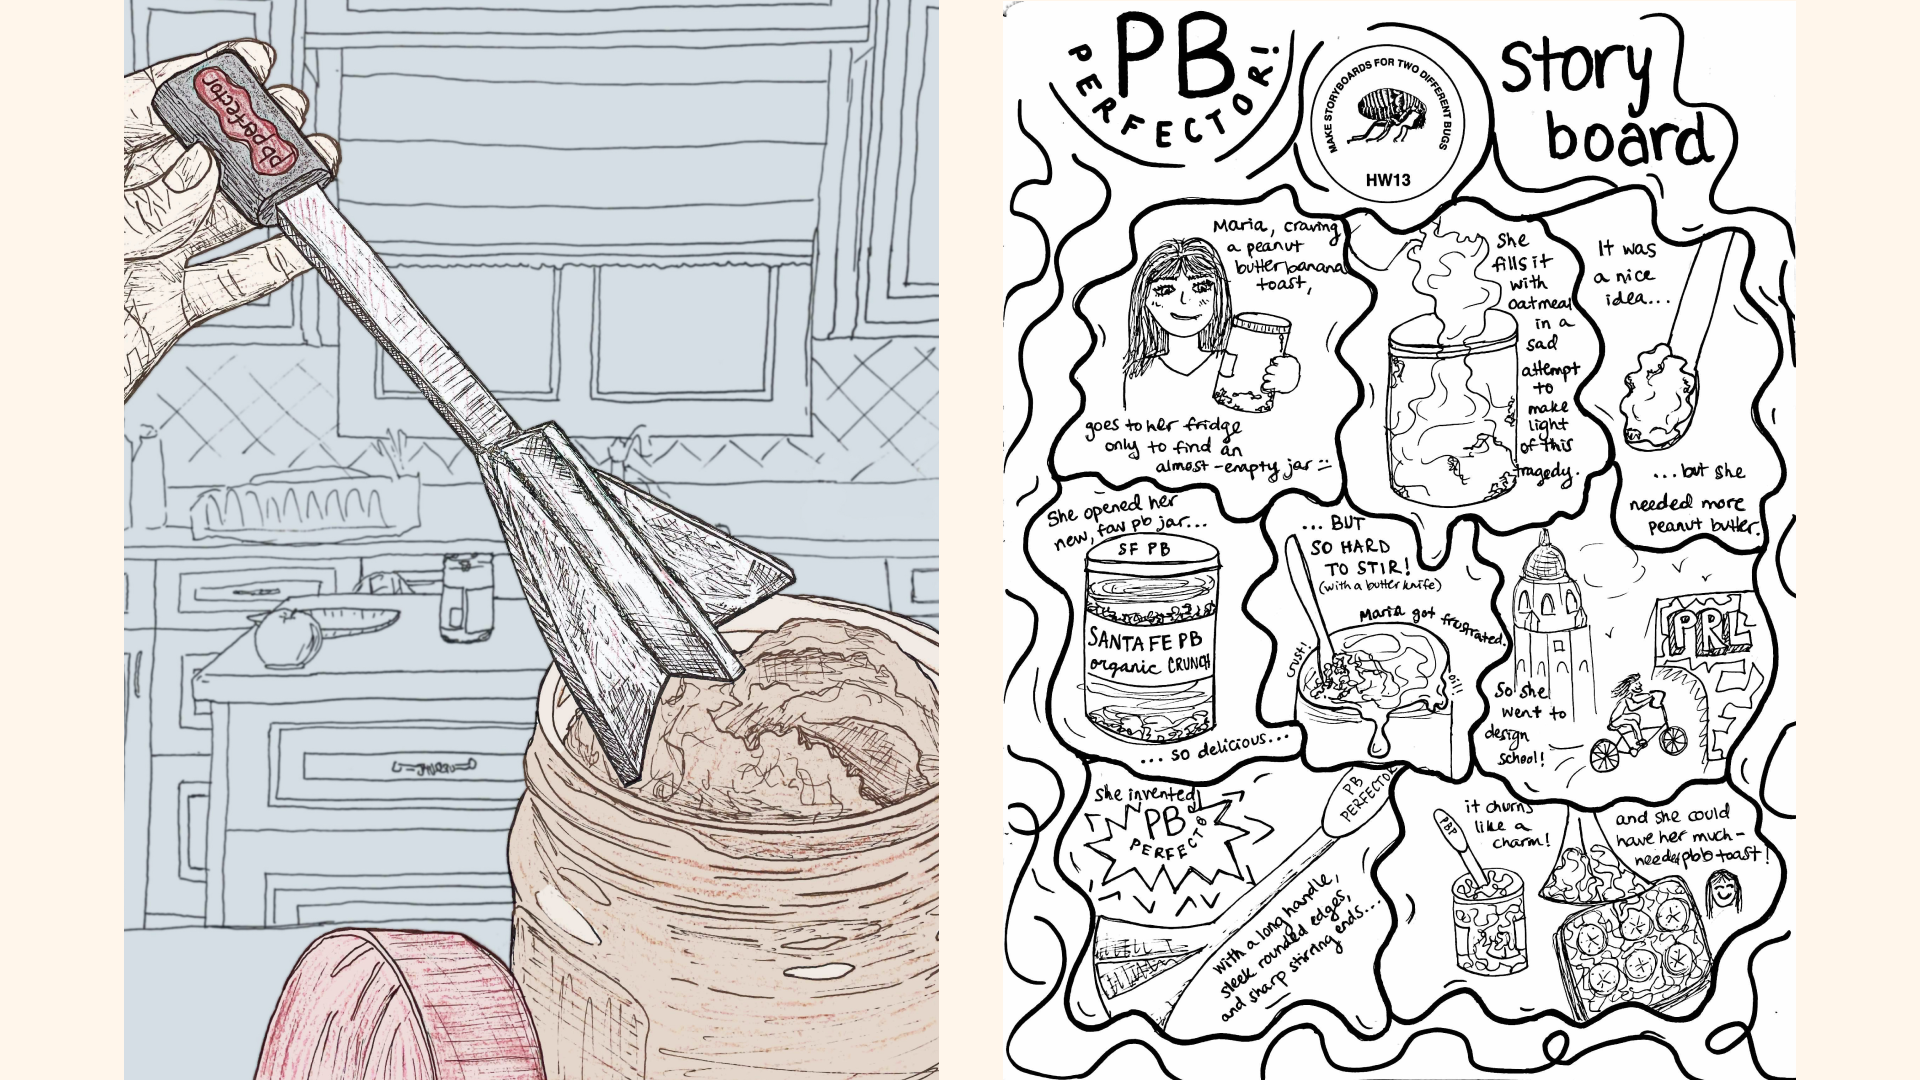
In fall 2019, my first quarter as a freshman at Stanford, I generated ideas for a 3-week-long design project by noting 50+ things in my daily life that bug me. I kept coming back to food, and as a peanut butter lover, a huge "bug" for me is the difficulty of stirring a new jar of natural peanut butter. This kind of nut butter has natural oil separation, requiring us to stir well before using. Normal butter knifes can never do the trick, though, as they don't reach all edges of the jar and don't provide sufficient leverage to stir.
The problem: natural peanut butter is difficult to stir due to oil separation
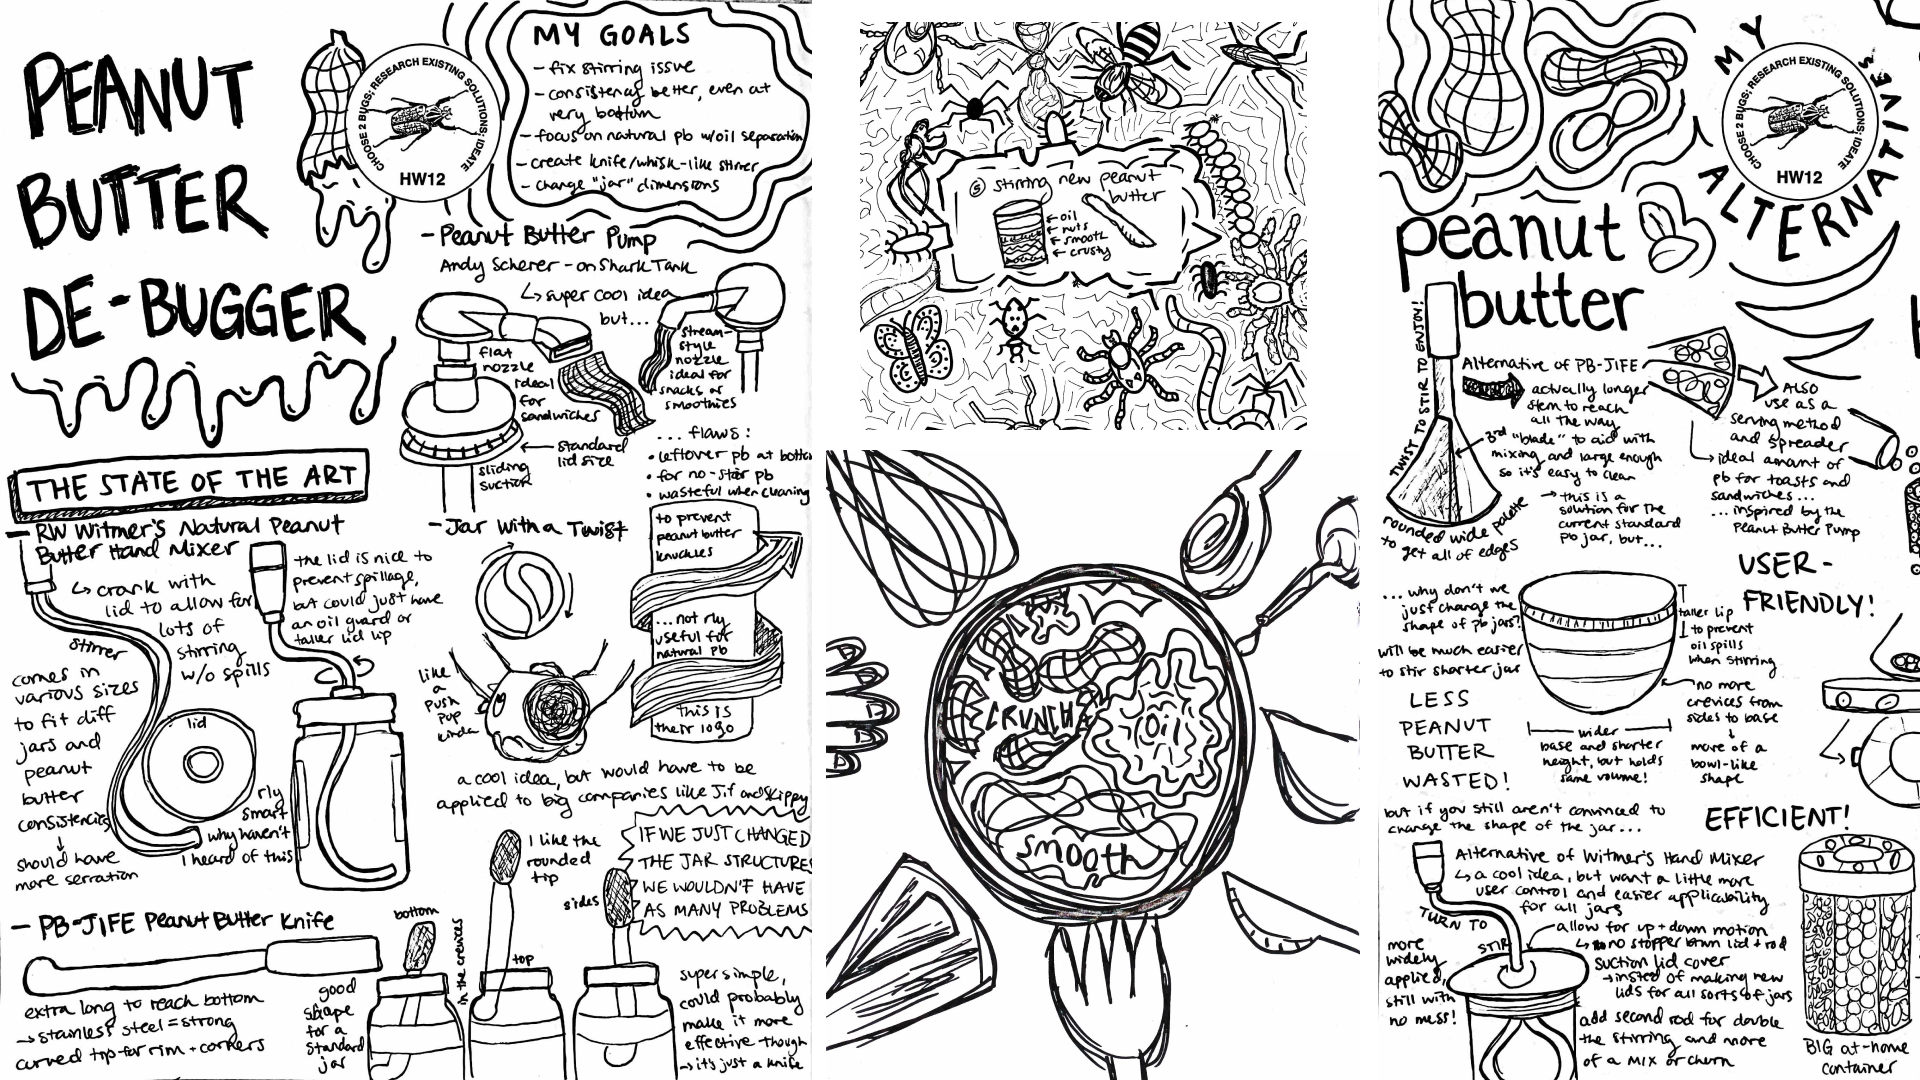
Researching competitors in the market, I found that a few other companies were exploring solutions this problem. However, none of them accomplished my design goals of making the stirring process more efficient, improving the peanut butter's consistency throughout the whole jar, focusing on natural peanut butter, and eliminating wasted product.
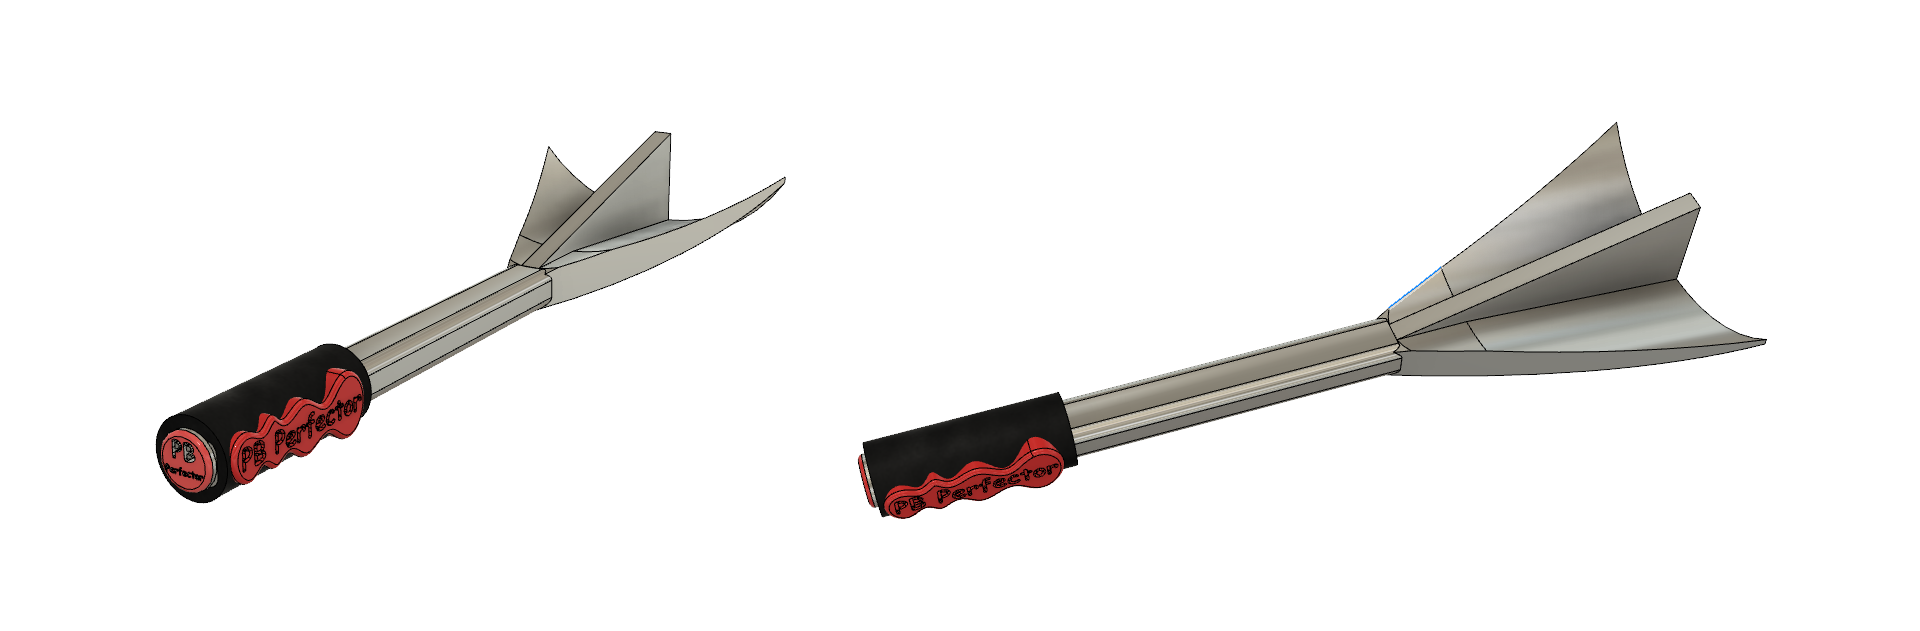
Taking inspiration from my research, I brainstormed, making alterations to existing products and ideating my own new tools. One of my ideas evolved into the Peanut Butter Perfector. This model borrows from other metallic tools and combines the functions of stirring and serving.
No items found.
PB Perfector was born
I iterated on my designs through sketching, storyboarding, prototyping, and testing.
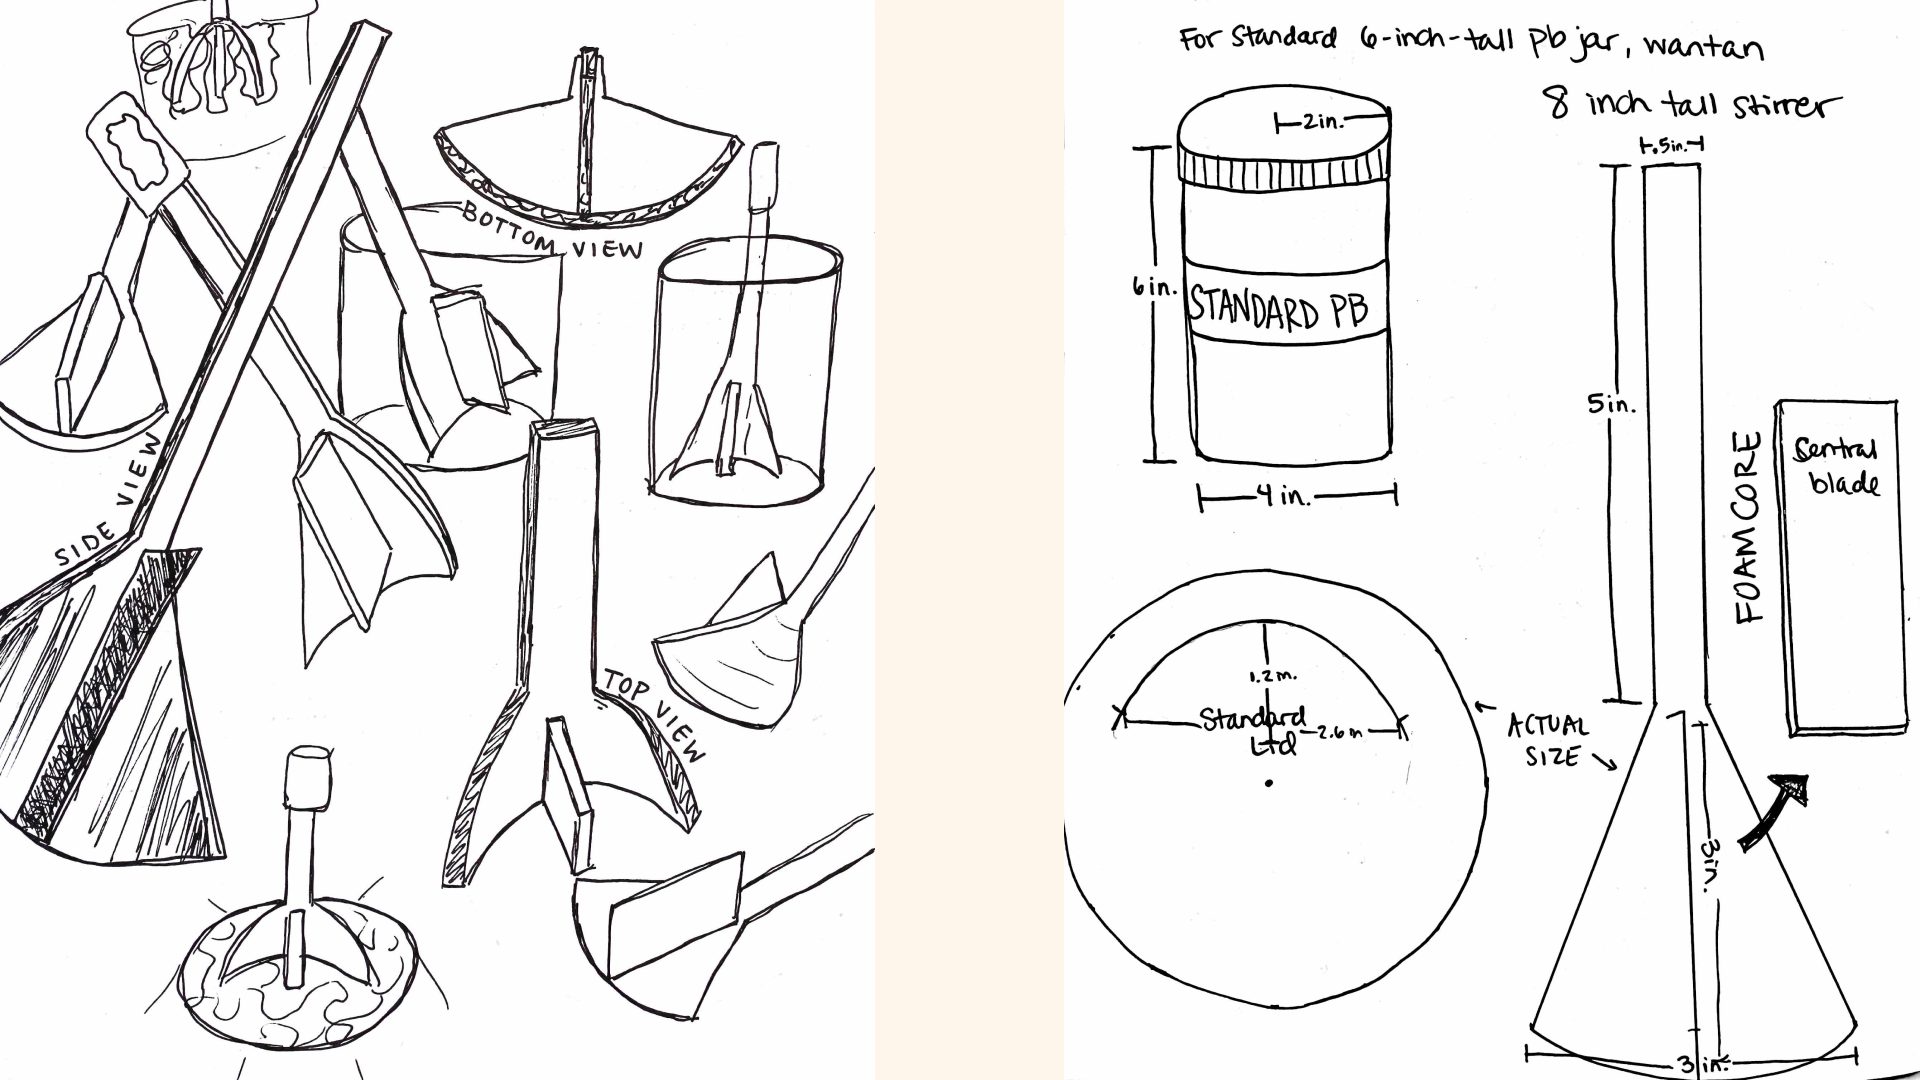
Design Specifications
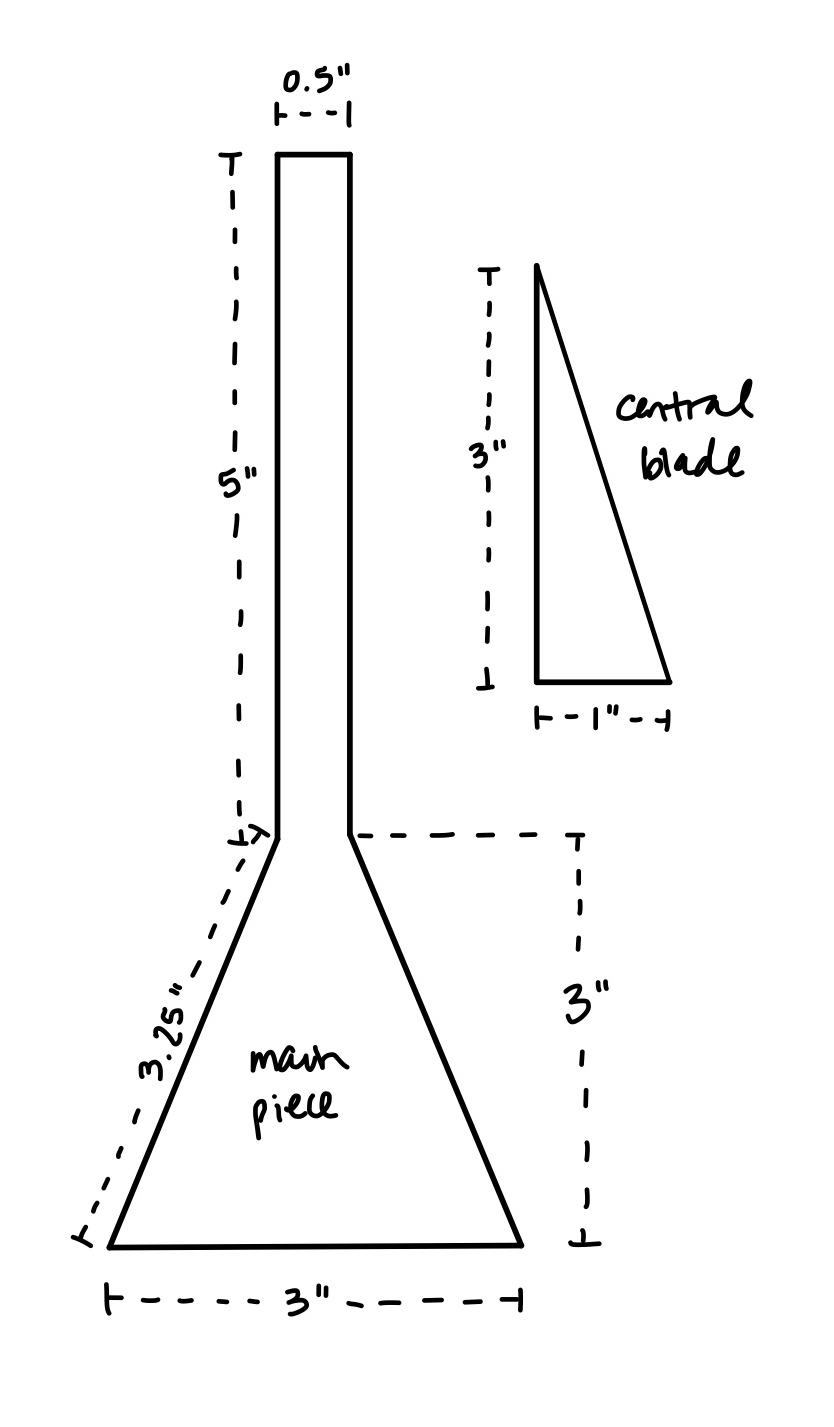
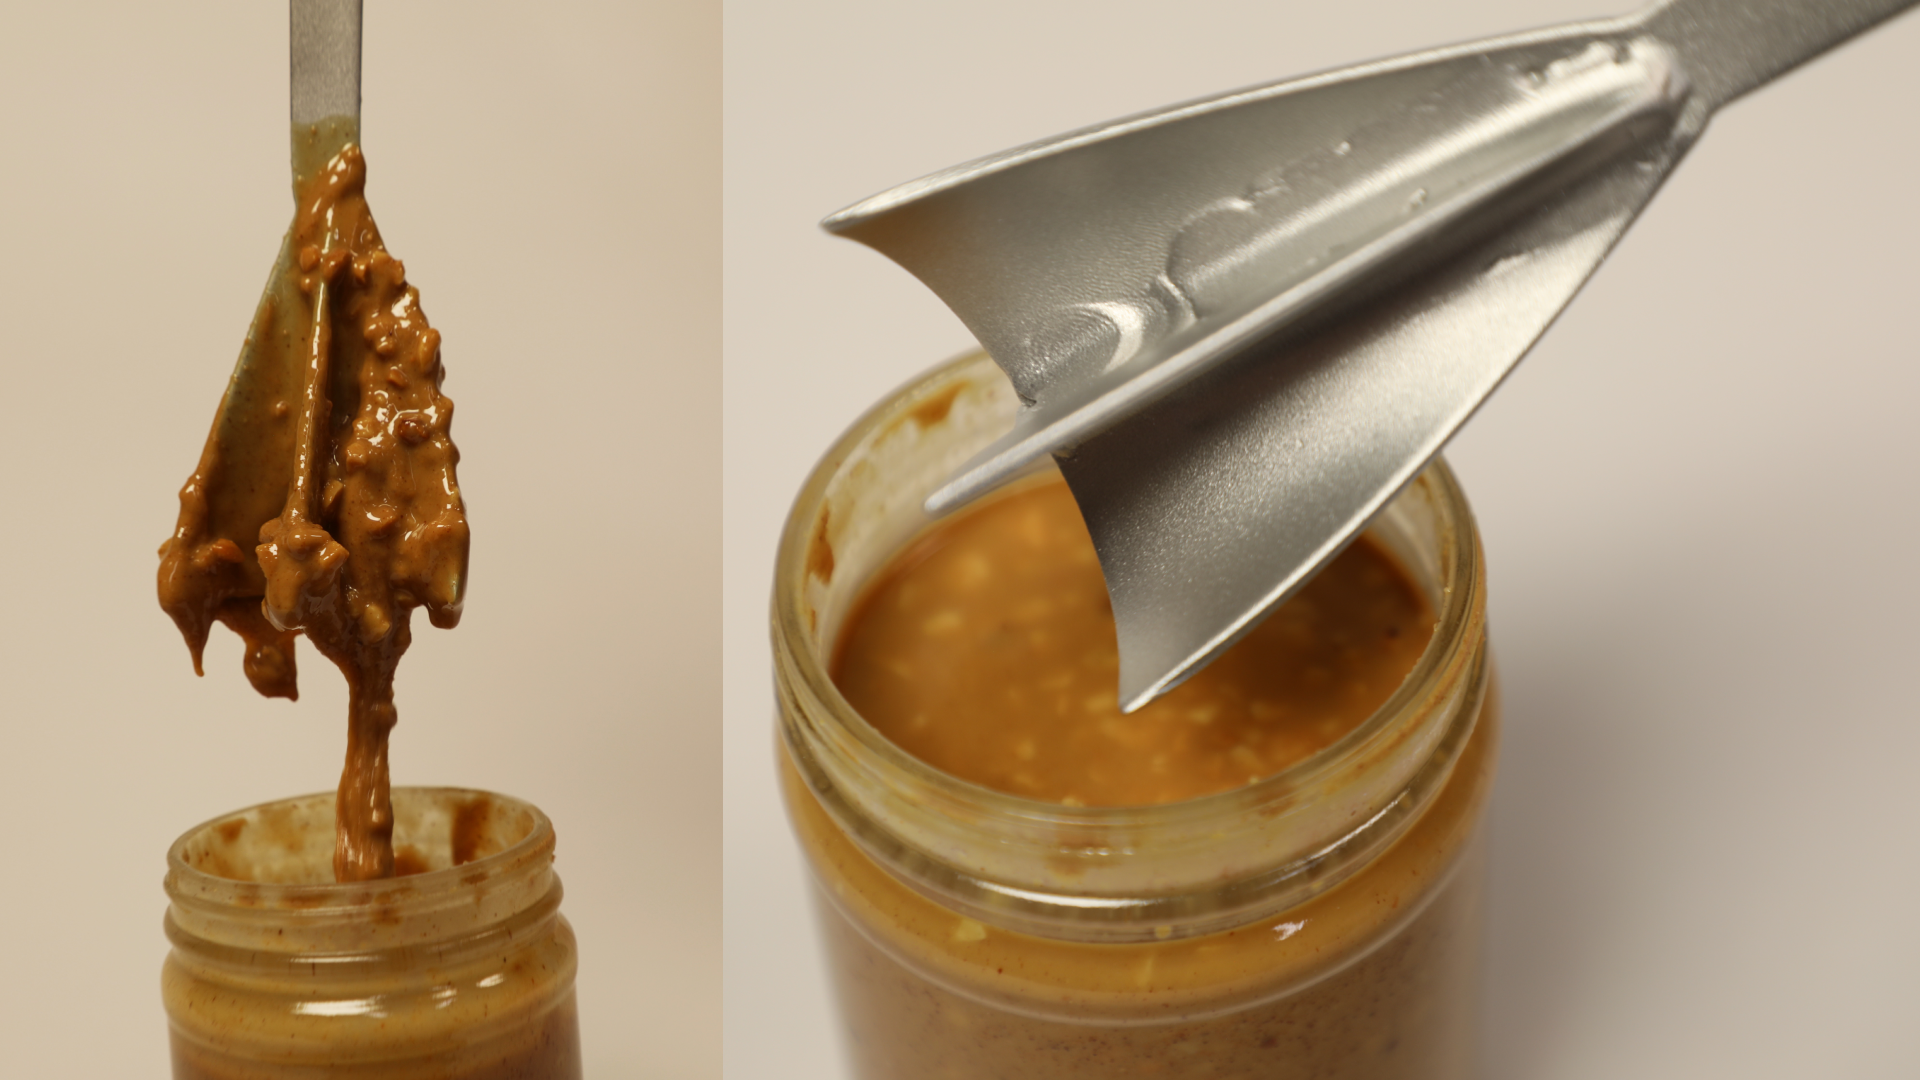
Based on the dimensions of a standard peanut butter jar (6" tall with 4" diameter), I determined that the PB Perfector should be 8" tall to allow for mess-free stirring and a graspable handle. I designed it with a 5" shaft and a 3" wide and 3" tall curved spatula end – small enough to allow for wiggle room and large enough to effectively scrape the jar's edges. The central blade makes the PB Perfector act like a whisk, making stirring and churning easier with more shear and normal forces than a butter knife.
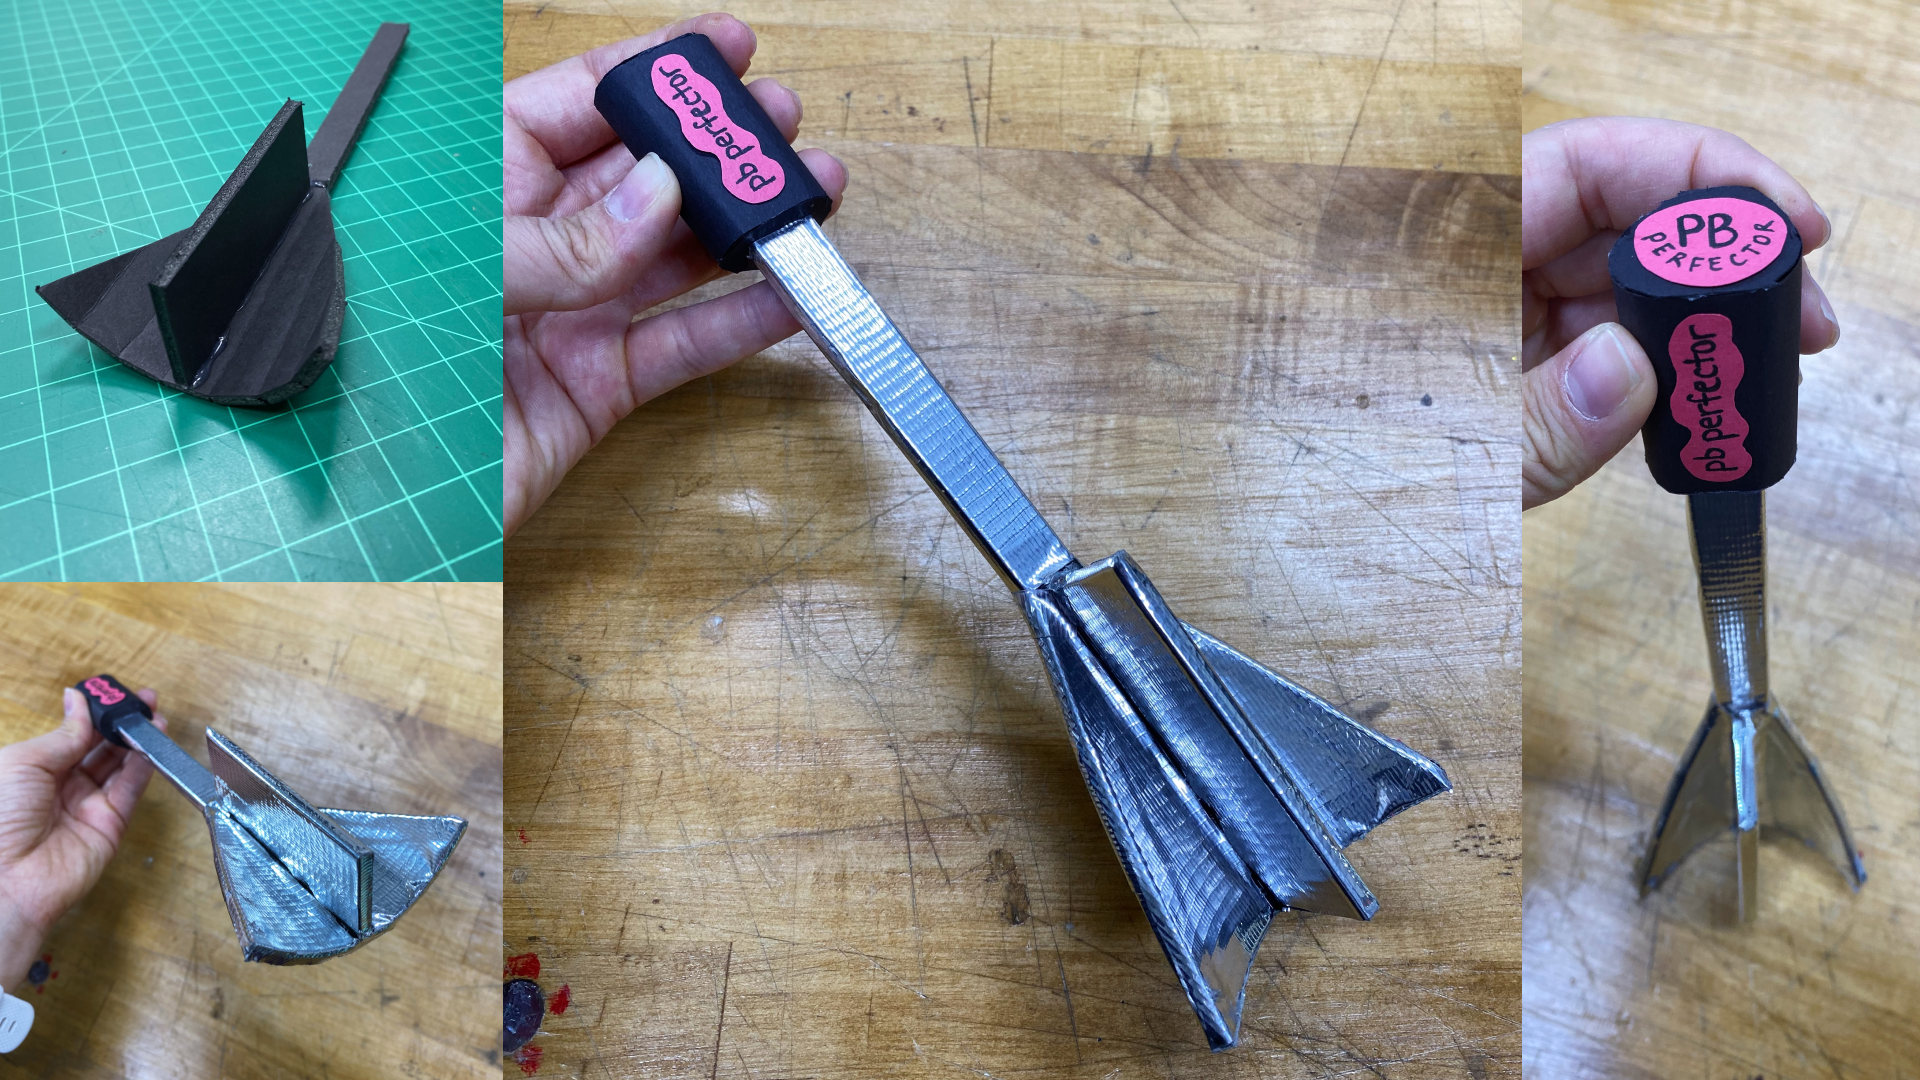
Initial Prototypes
I made my first rapid prototype out of foam core to test out the product's dimensions and the curvature against a peanut butter jar.
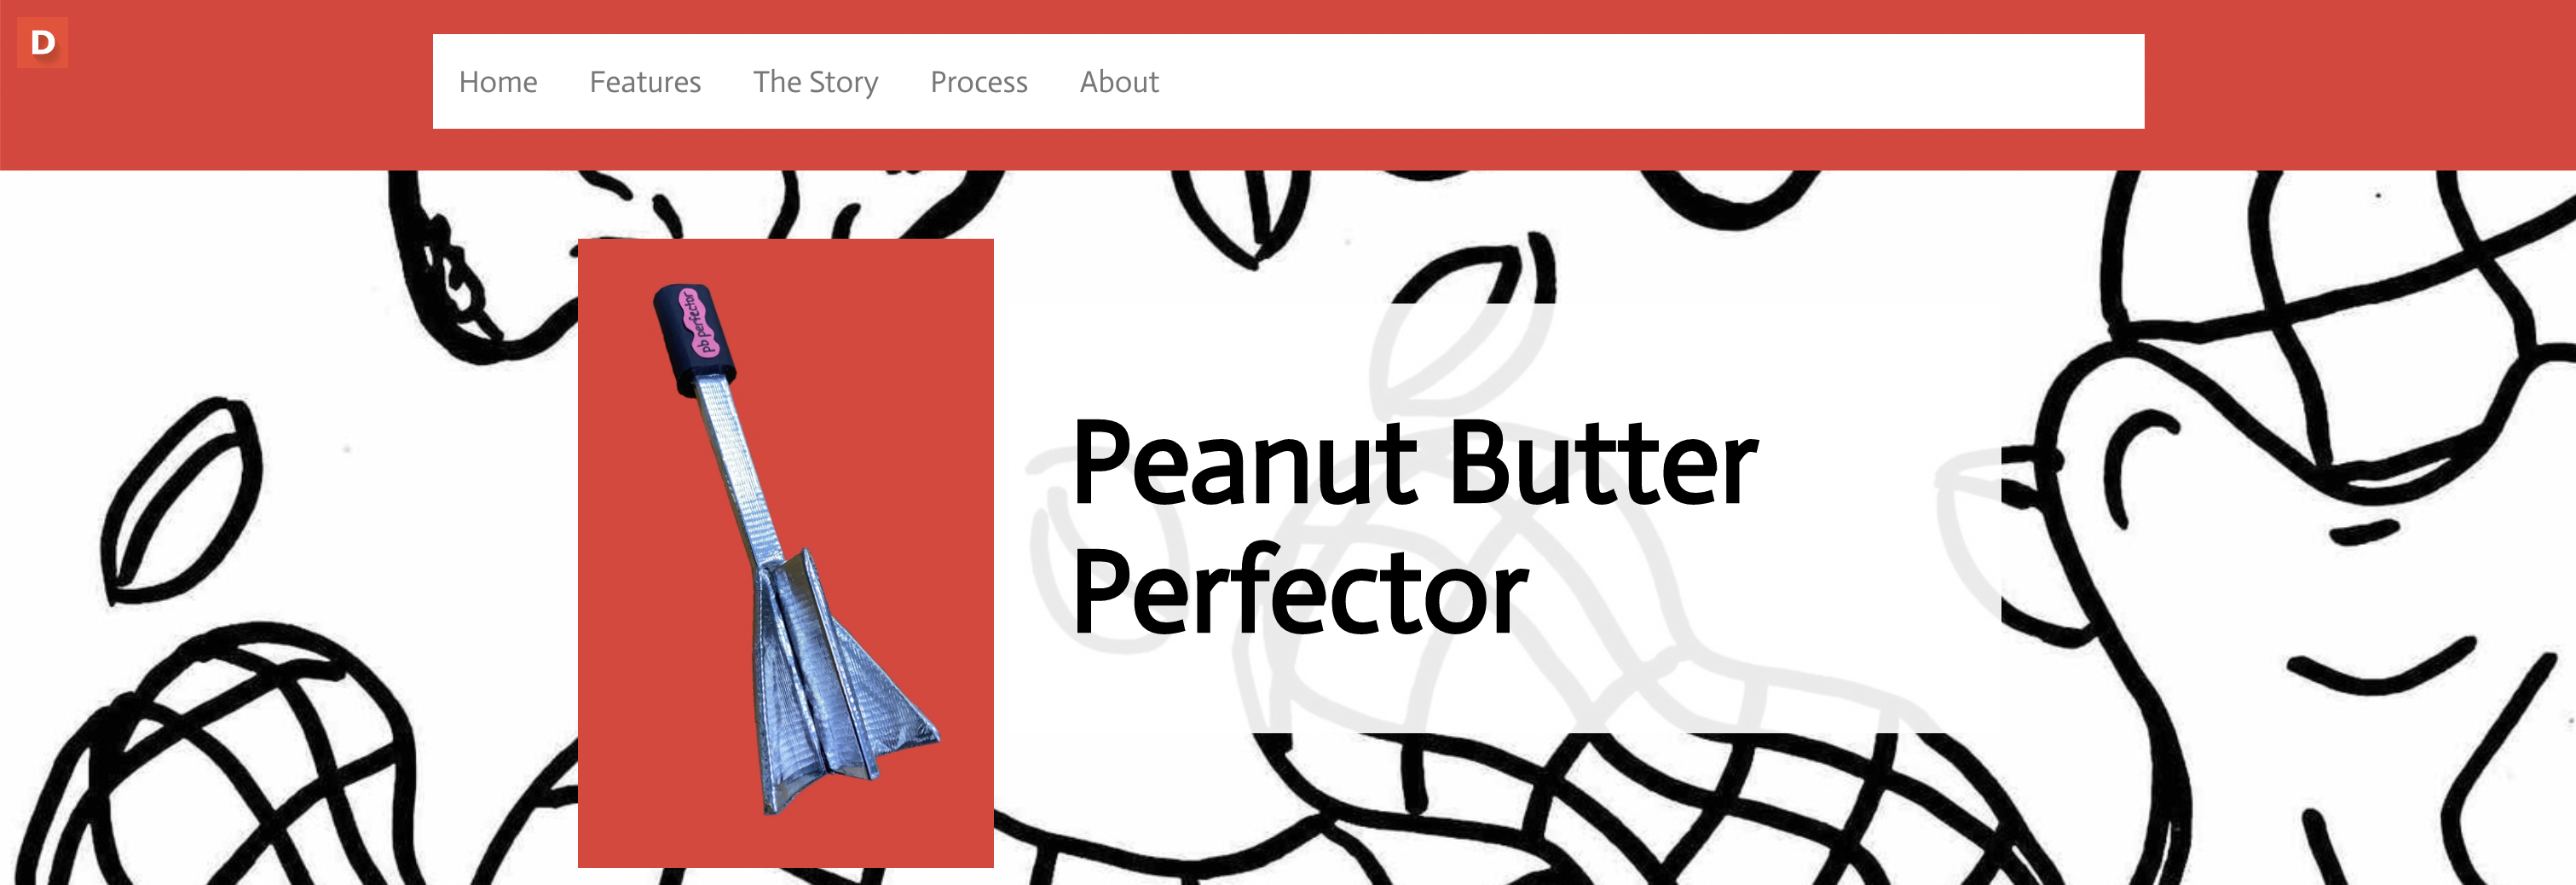
After testing the dimensions, I made a higher-fidelity looks-like prototype and a CAD model to convey my product idea to others. I made this out of foam core, duct tape, and paper.
Product Website
The end result of this part of the project was a product pitch to my class, this looks-like prototype, and a portfolio website telling the story of the PB Perfector. In this website, I share my process, the inspiration for the product, the product features, and a bit about myself. Feel free to check it out here!
No items found.
Preparing to manufacture
Two and a half years later, after the pandemic settled down and students were allowed back on campus, I took a Product Realization course during which I could manufacture anything I wanted in Stanford's Product Realization Lab over the course of 7 weeks. The PB Perfector came to mind quickly, as it had been one of my proudest projects and a big talking point with friends and family.
Works-Like Prototyping
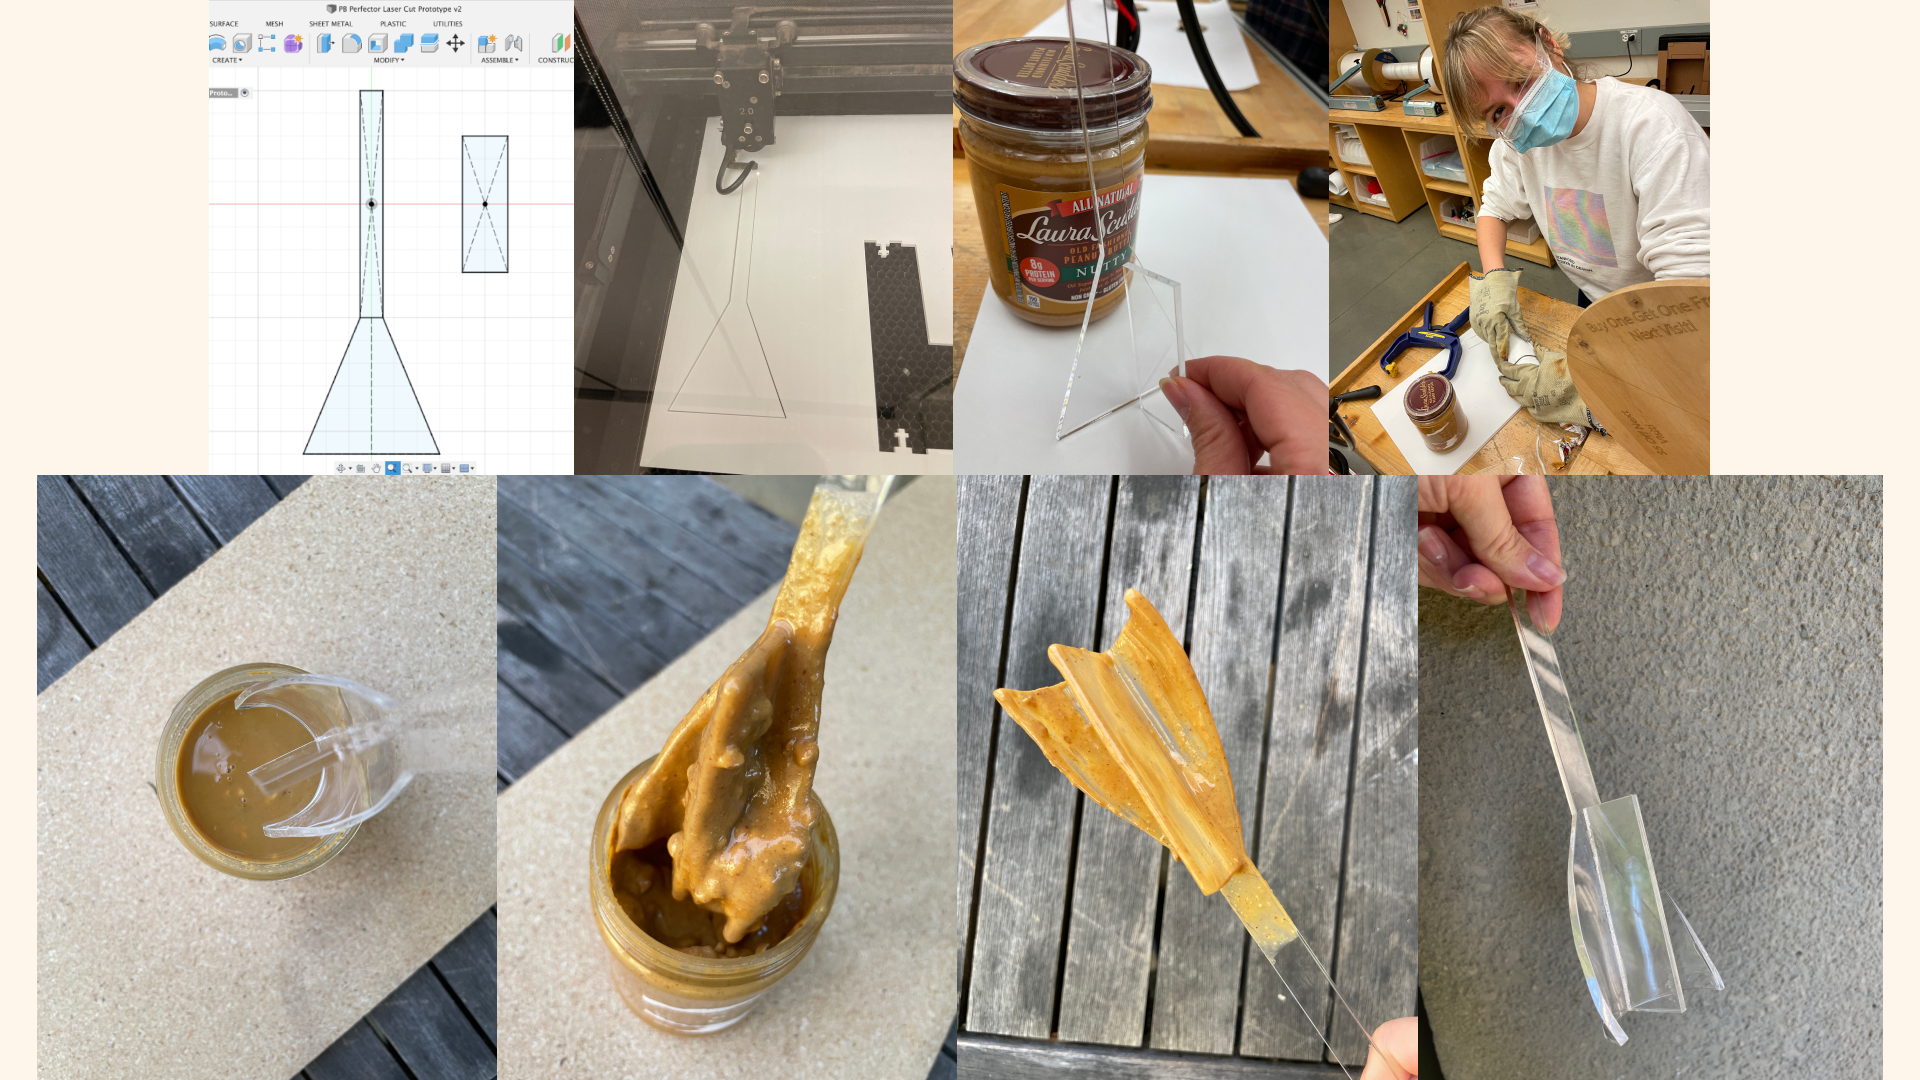
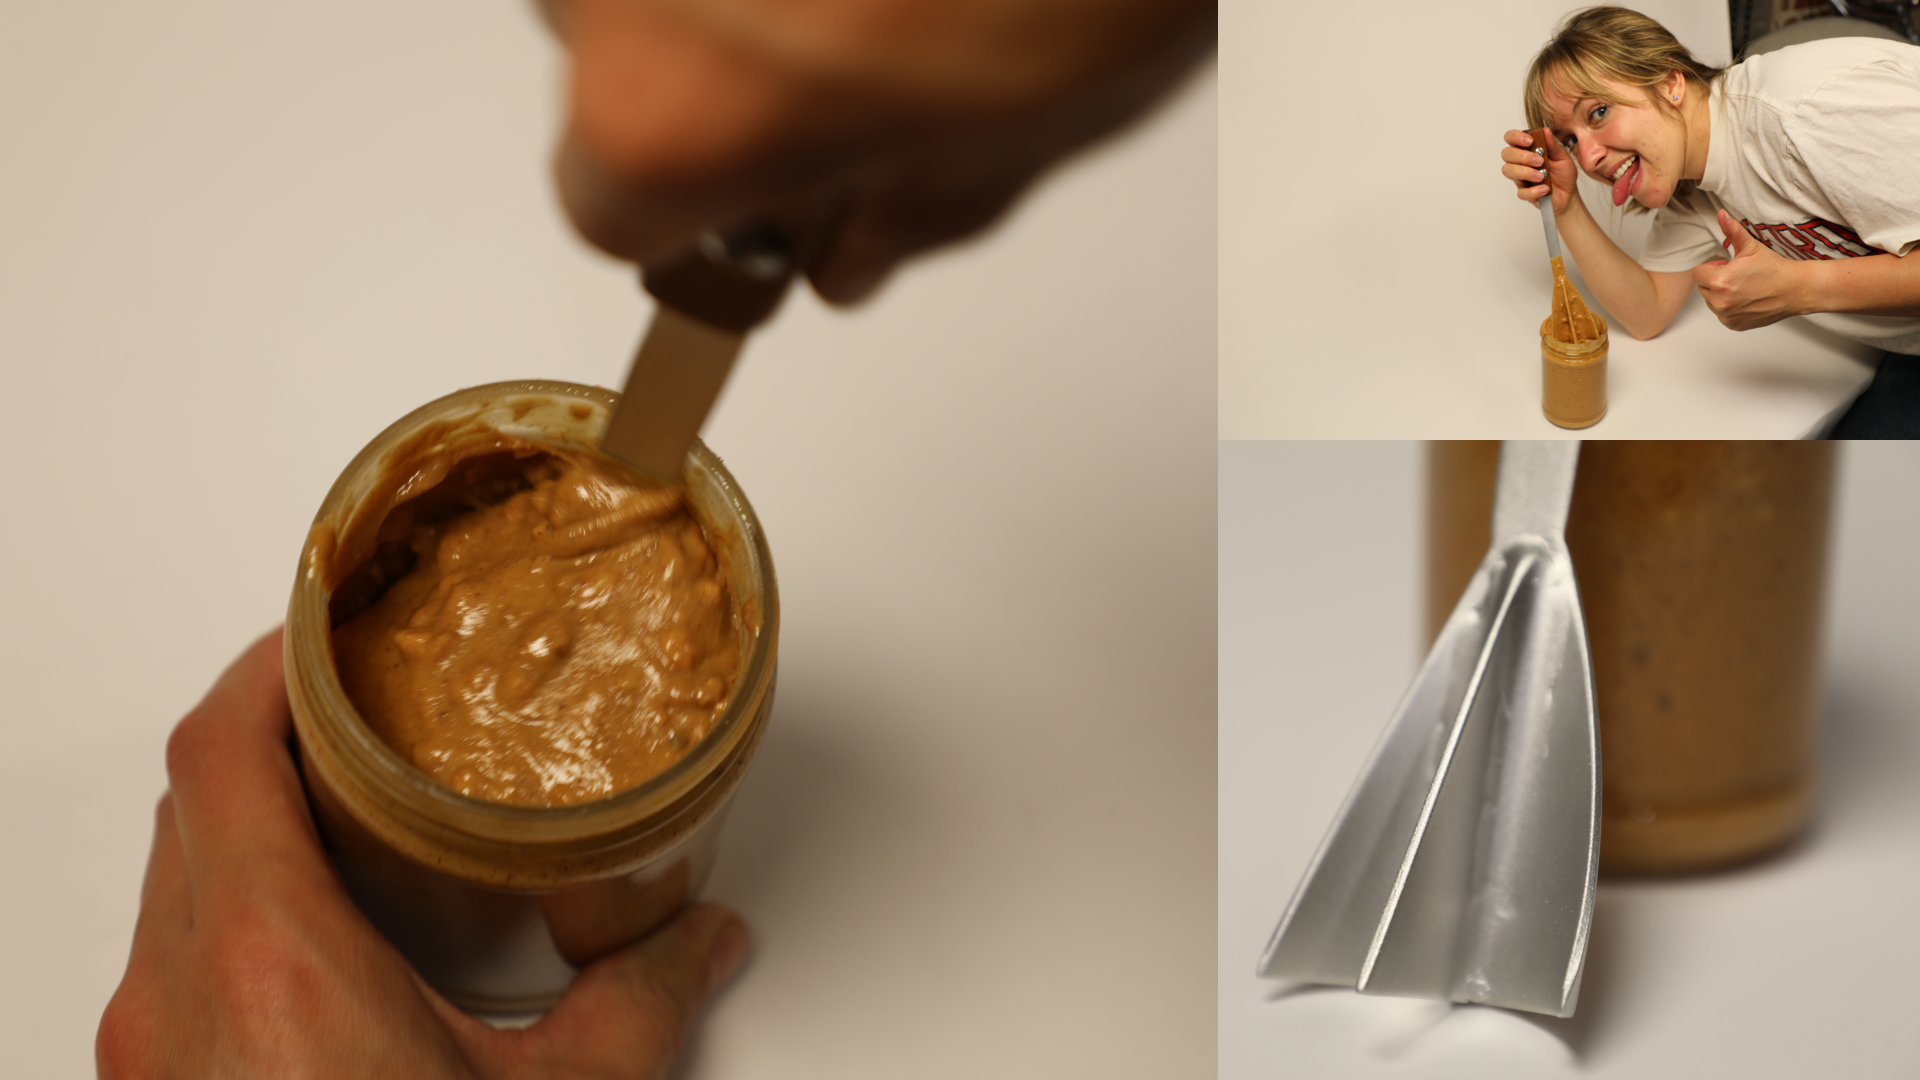
Before starting the manufacturing process, I tested the PB Perfector's functionality with a works-like prototype made out of acrylic. My driving question: "Does the shape of this utensil actually stir and mix naturally separated peanut butter more effectively than a butter knife?"
To test this, I CADed the two flat pieces composing the PB Perfector and laser cut the shapes out of 1/8" thick clear acrylic. I bent the acrylic using heat to curve the spatula part, and I connected the central blade to the main piece using acrylic cement.
I was pleasantly surprised with how well this quick prototype worked. It stirred, churned, and mixed the peanut butter quickly and effectively. Despite not prototyping a handle, it was easy to use and hold.
This works-like prototype gave me the confidence to move on to manufacturing!
(note: acrylic cement is not food safe... don't worry, I used a peanut butter jar dedicated to testing!)
No items found.
Manufacturing!
Having validated the effectiveness of the PB Perfector, I moved on to manufacturing. I created a Bill of Materials, a CAD model, and an Operations Sequence for how I would manufacture this.
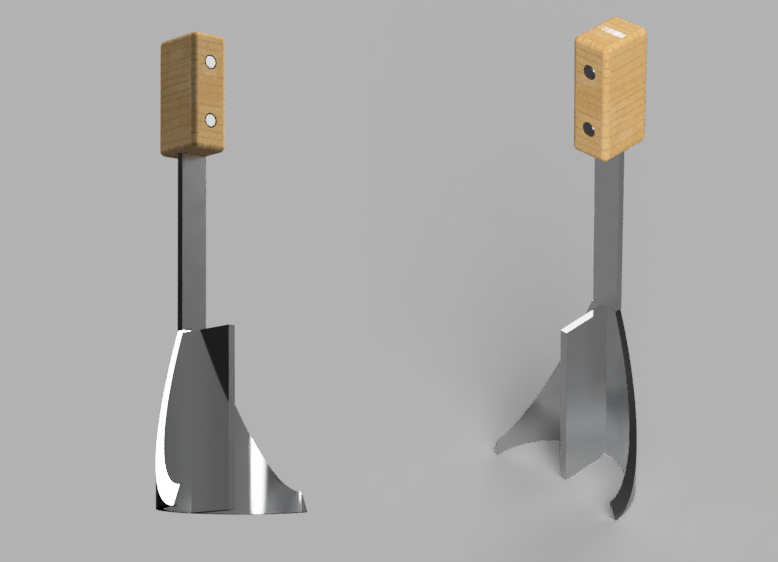
With the options of milling, lathing, casting, and welding, I determined that sheet metal welding would be the most successful method of manufacturing for this product. I chose to use 1/8" thick aluminum because it's food safe and affordable, and TIG (tungsten inert gas) welding was the most suitable type of welding for this material. I chose to make the handle out of wood for a simple, classic look, taking inspiration from knife handles. To secure the wood and metal pieces of the handle together, I chose to use binding barrels and screws for ease of assembly and disassembly.
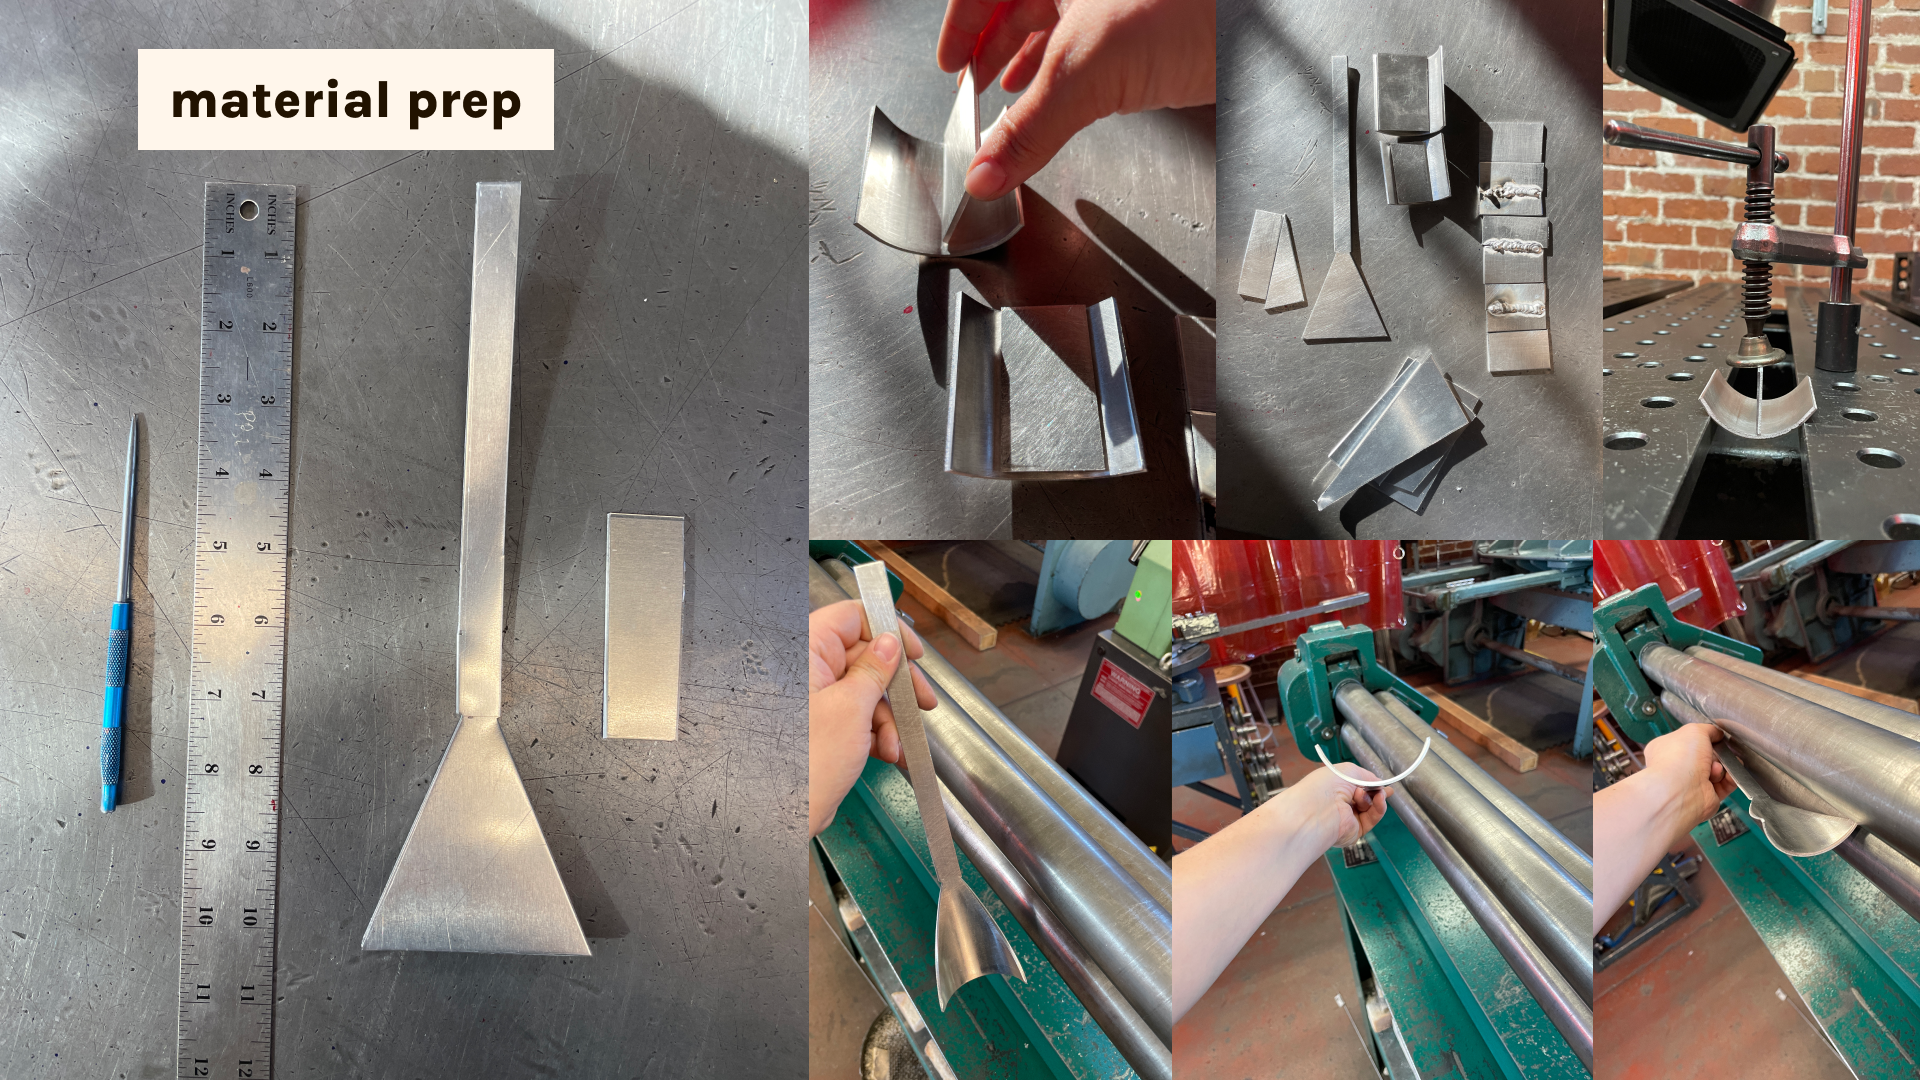
Sheet Metal Operations Sequence
Material: ⅛" thick aluminum sheet metal, 5052-H32
Tools: Power Shear, Corner Notcher, Sheet Metal Roller, TIG Welding, Sheet Metal Hole Puncher
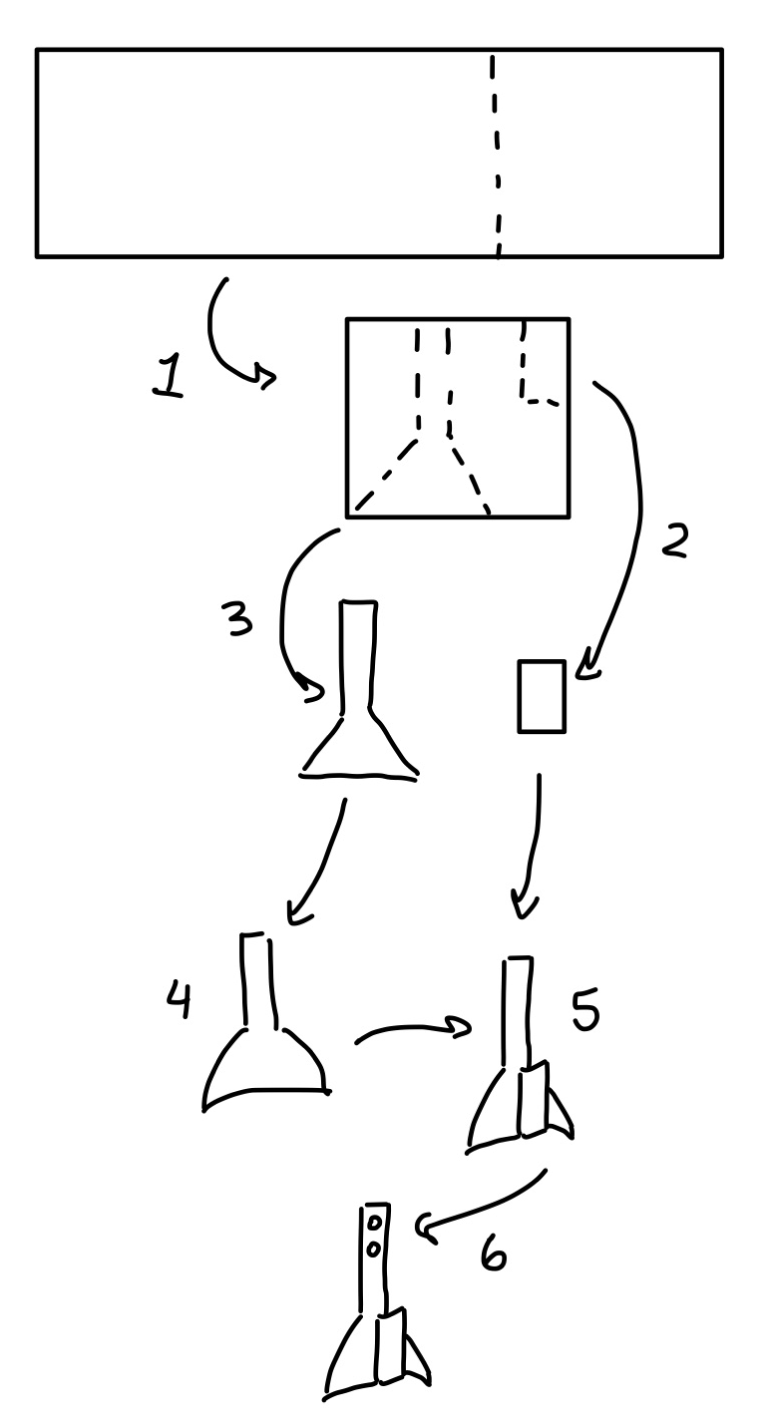
Process:
Use Power Shear to cut out 6" x 9" piece of aluminum sheet metal
Use Corner Notcher to cut out central blade piece
Use Corner Notcher to cut out main piece (repeating multiple times to obtain desired angles)
Roll sheet metal triangle into approximately 1.75" diameter semicircle using Sheet Metal Roller
TIG Weld central blade piece to main piece
Use Sheet Metal Hole Puncher to create 1/4" diameter holes
* Throughout my welding practice, I decided to change the shape of the PB Perfector's central blade from rectangular to triangular for a more seamless design. This made my welding more difficult, but it was worth it for the aesthetic and functional improvements.
Use Bandsaw to cut wood block into two smaller pieces
Use Drill to create 1/4" diameter holes aligned with holes in sheet metal
Use Sandpaper to create curvature in handle for ease of use
Connect wood and metal pieces by putting binding barrels and screws through aligned holes
No items found.
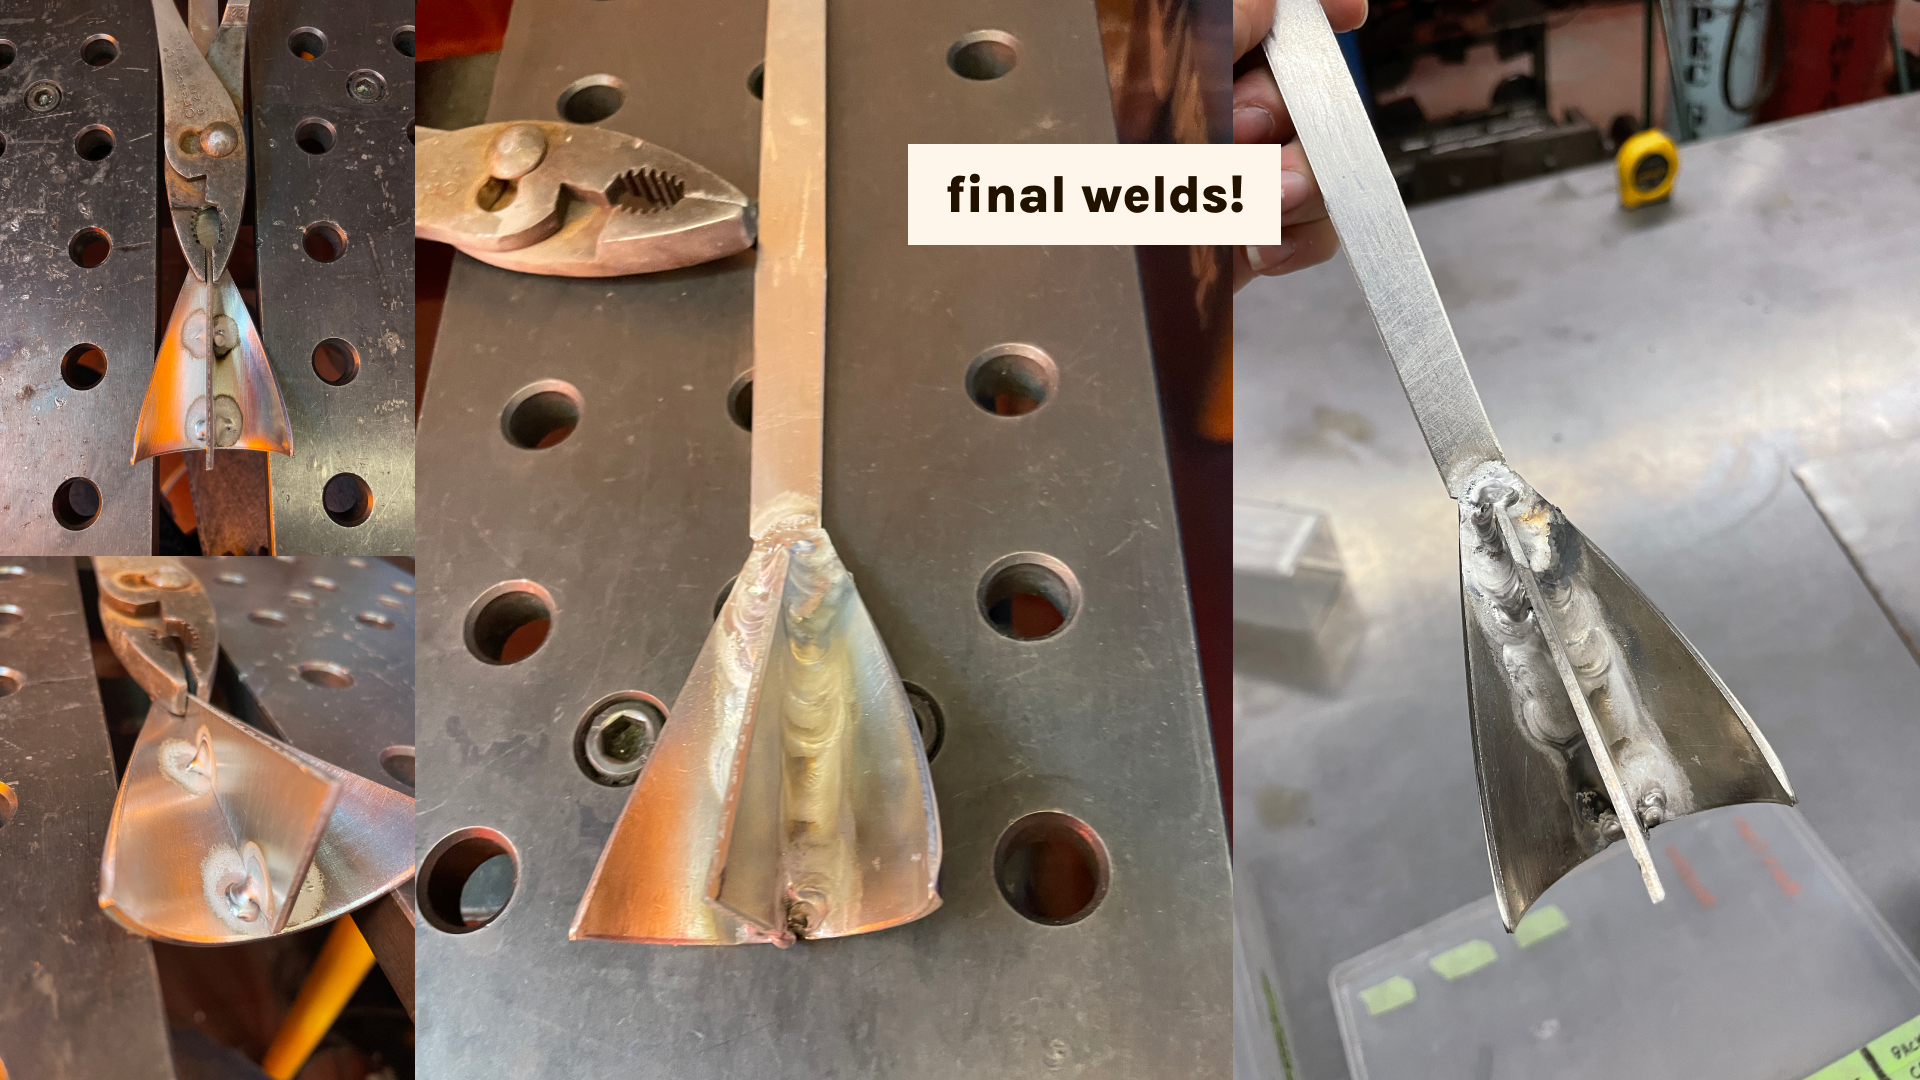
Welding Challenges
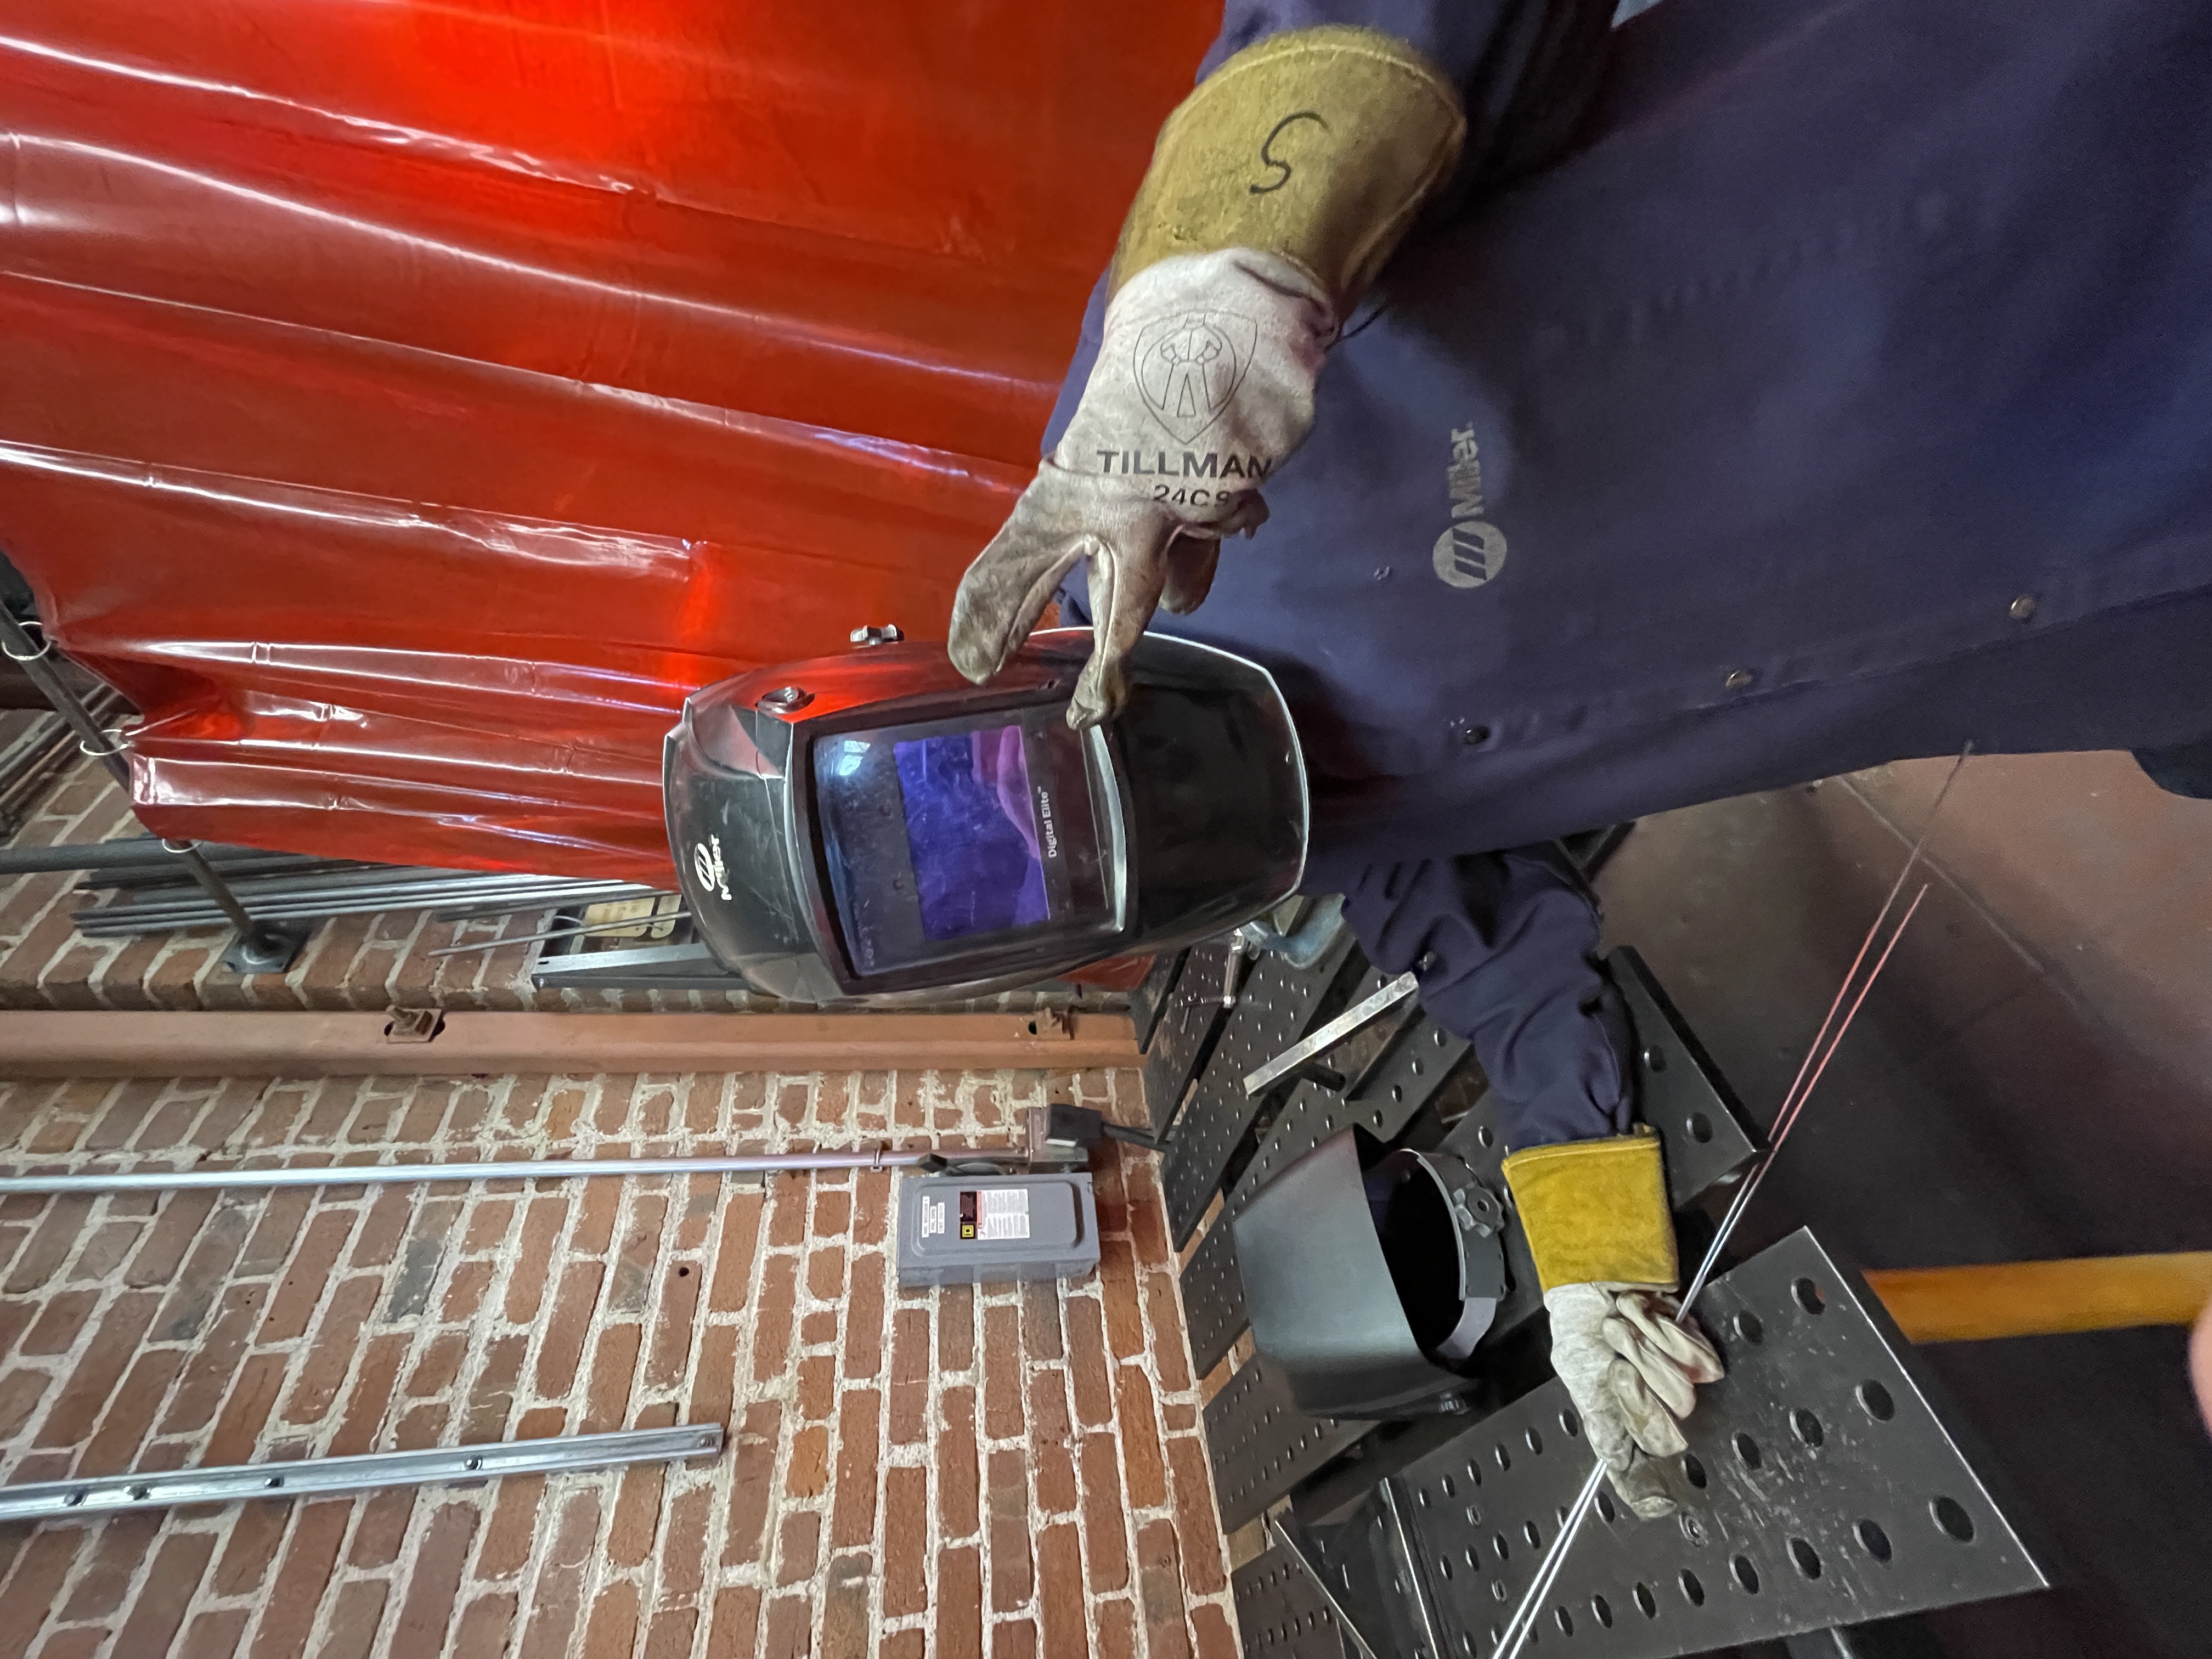
TIG welding aluminum came with a steep learning curve. I first had to learn how to TIG weld on stainless steel because it's easier to weld than aluminum, so I practiced for multiple shop sessions on scrap pieces of various shapes and sizes. After graduating from stainless steel, practicing on aluminum was a whole new game. Aluminum TIG welding requires quick, precise movements because it melts quickly, so there's a real art to forming the puddle of metal, moving it smoothly and quickly, and combining the two metal pieces together.
Welding is an art that requires precision, rhythm, patience, and infinite practice. There are many similarities between welding and rowing, which I learned to do concurrently.
The angles and curvature of the PB Perfector provided challenges in setting up for welding. I needed to set up the two pieces so that the central blade was balancing on the main metal piece. This required several rounds of testing different setups, using various types of clamps in unconventional positions.
Once I was set up to weld, it was also difficult maneuver my tungsten electrode into the tight corners of the PB Perfector. I also needed to use filler rod metal to make this weld possible, which also required trial and error. By adjusting the machine's amperage, varying the amount of filler rod, switching my weld starting points, welding back over previous welds, and lots and lots of practice, I built up the skill necessary to creating my final welds, which were structurally sound and smoothly integrated the metal pieces!
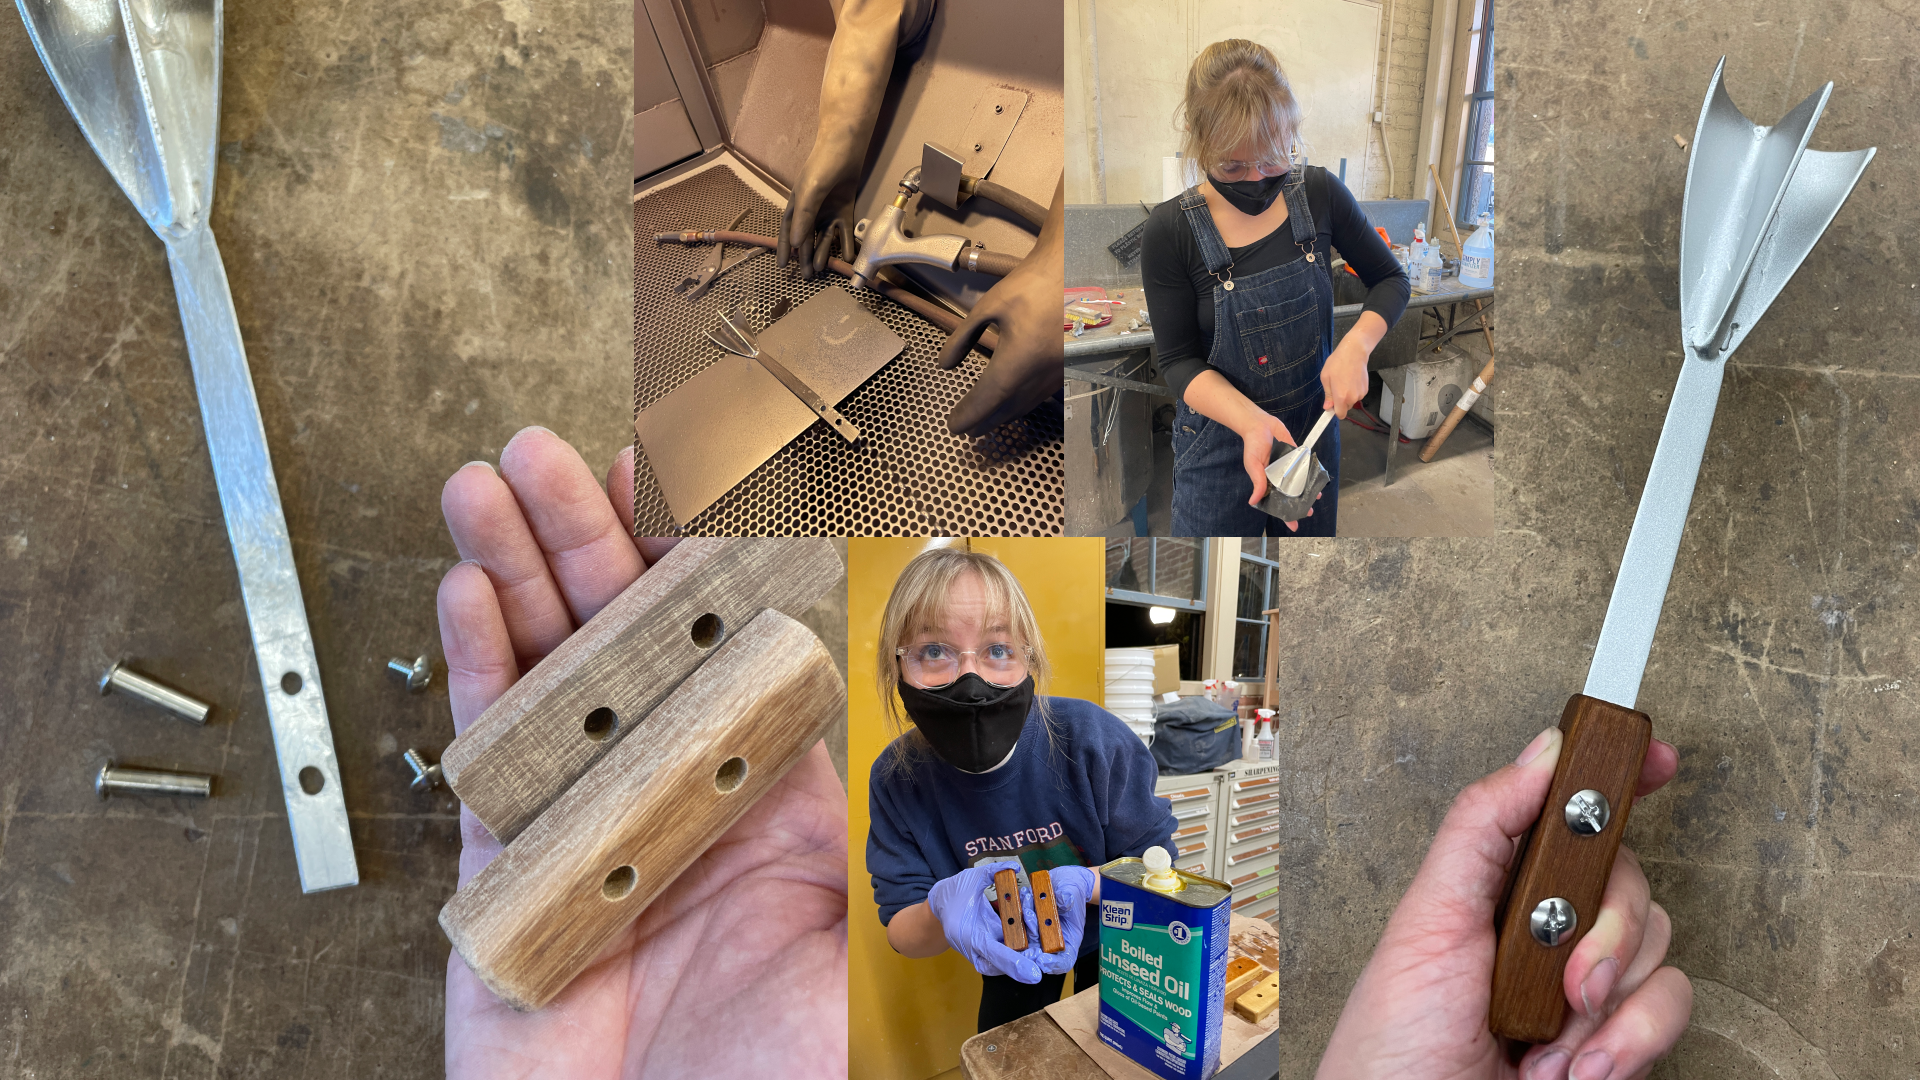
Finishing
To finish my welded metal piece and make it polished and aesthetically pleasing, I spent hours grinding down my welds and sanding the piece. My goal was to make the welds look and feel as smooth as possible while removing as many scratches as I could. After this grinding and sanding, I bead blasted the metal piece to give it a nice uniform finish.
For the wooden pieces of the handle, I used sandpaper to smooth out the edges and shape the handle. I then stained the wood using linseed oil, which brought out a nice rich color in the wood.
No items found.
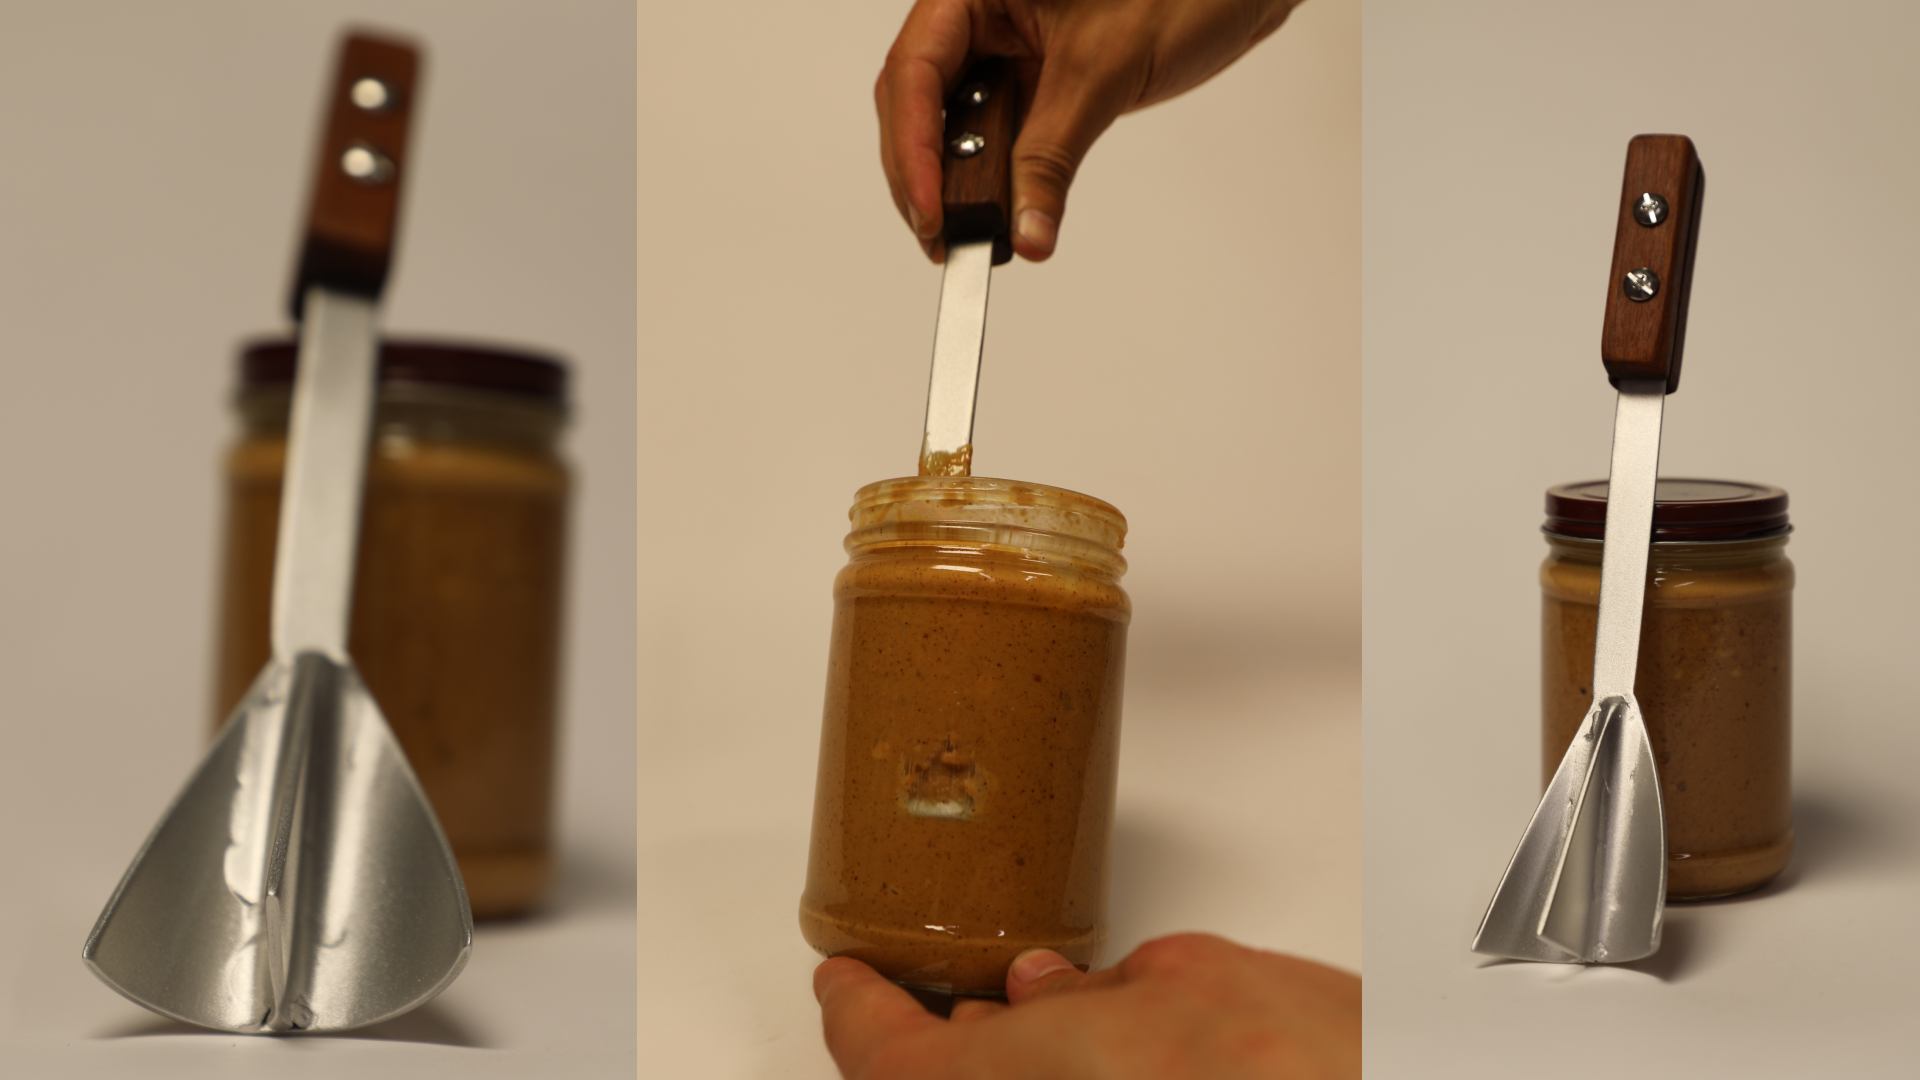
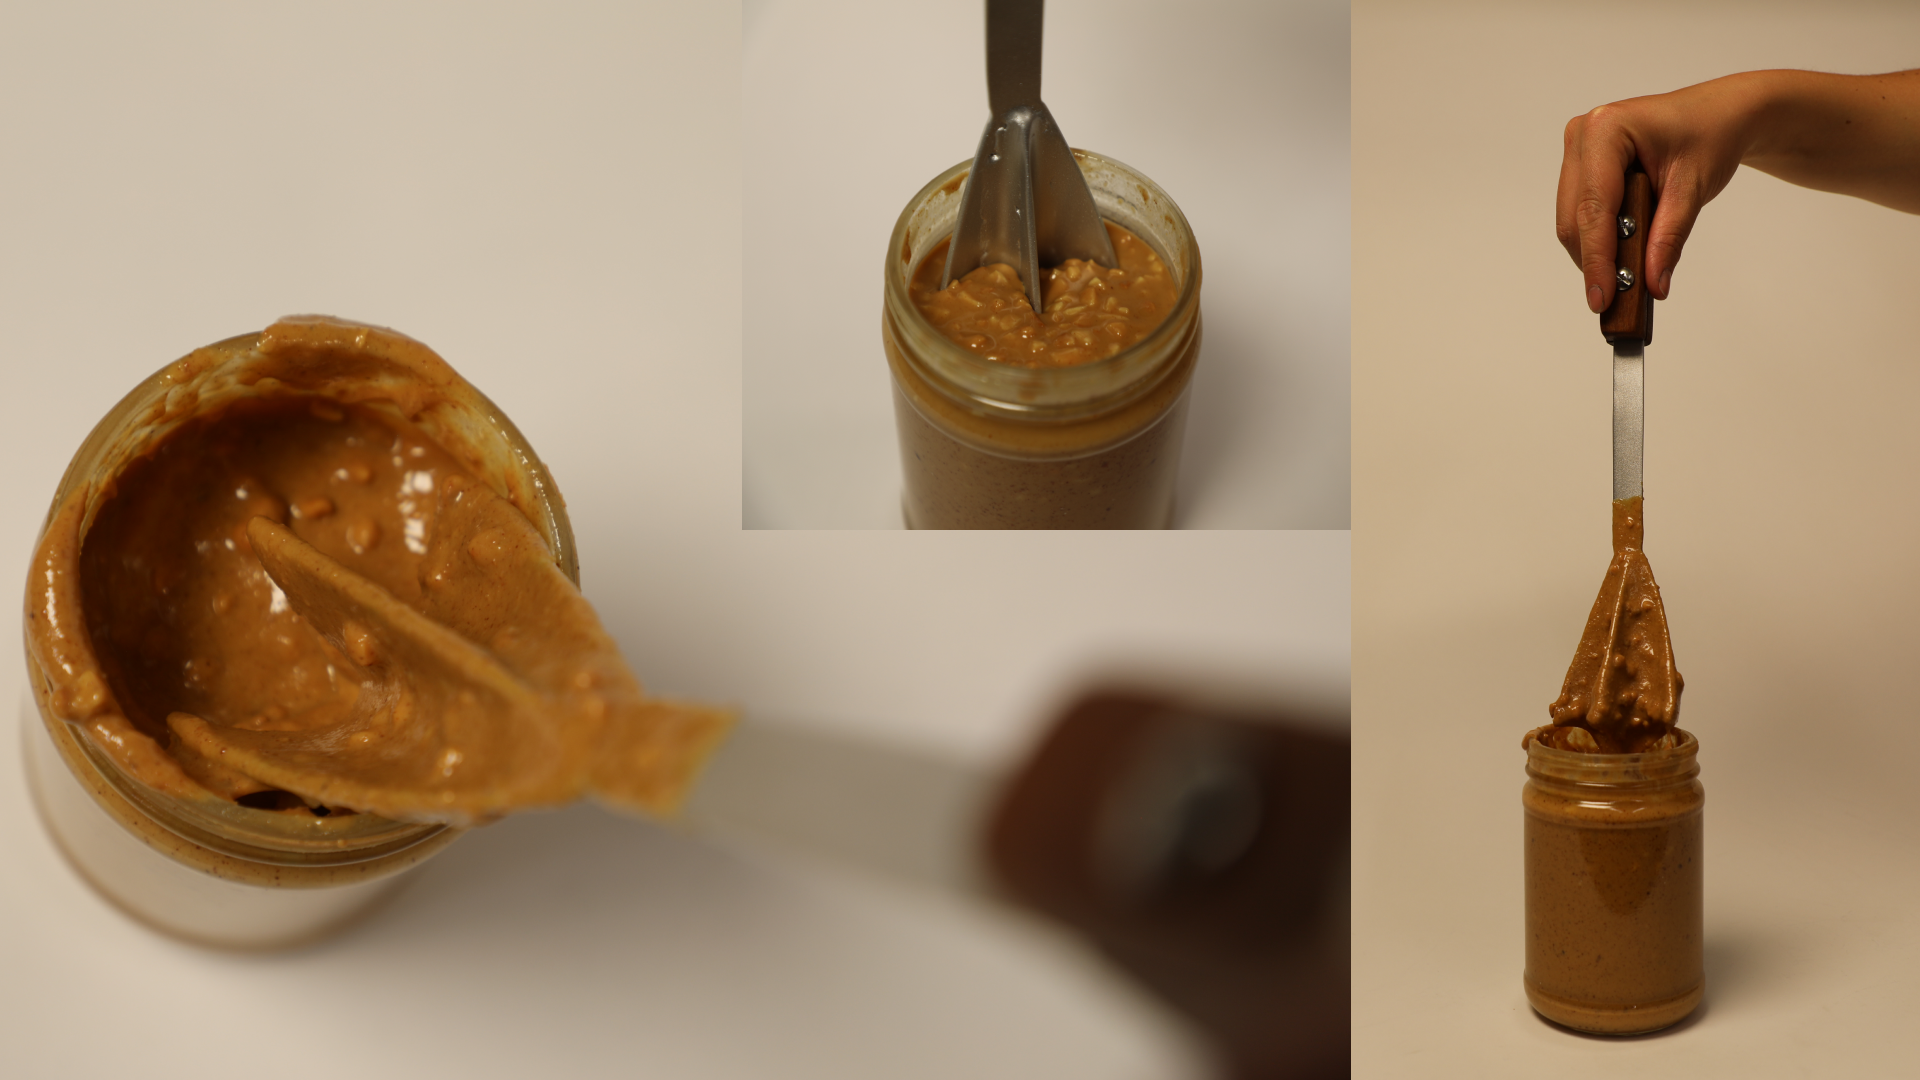
Peanut Butter = Perfected
Learnings
Throughout this project, I grew tremendously as a learner, designer, and thinker.
Manufacturing the PB Perfector was intensely challenging yet rewarding. I ran into many roadblocks during this seemingly simple manufacturing process, for example: unexpectedly time-intensive material prep, getting my hand caught in the sheet metal roller, and welding mishaps. Through these challenges, I grew and learned so much.
The initial idea for the PB Perfector was my first novel product invention, and this was the first product that I fully manufactured by hand. It's so gratifying to have a real, working PB Perfector that I can use!
Next Steps
I've received a lot of positive feedback from my peers and professors. Professor David Beach, co-director of Stanford's Product Realization Lab, suggests that I take it to market! With more time, I would devise a business plan and a plan for how to make it mass-manufacturable. I'm also curious to explore accompanying features that could make cleanup of the tool easier – one idea I had is a scraper piece that matches the outline of the PB Perfector to easily scrape off any excess peanut butter buildup.